
Azure Active Directory (Azure AD) is Microsoft's enterprise identity and access management cloud service, which helps to manage multiple on-premises infrastructure components and systems using a single identity per user.
First step: creating a SAML application
1. On the Azure portal homepage click the Azure Active Directory icon.
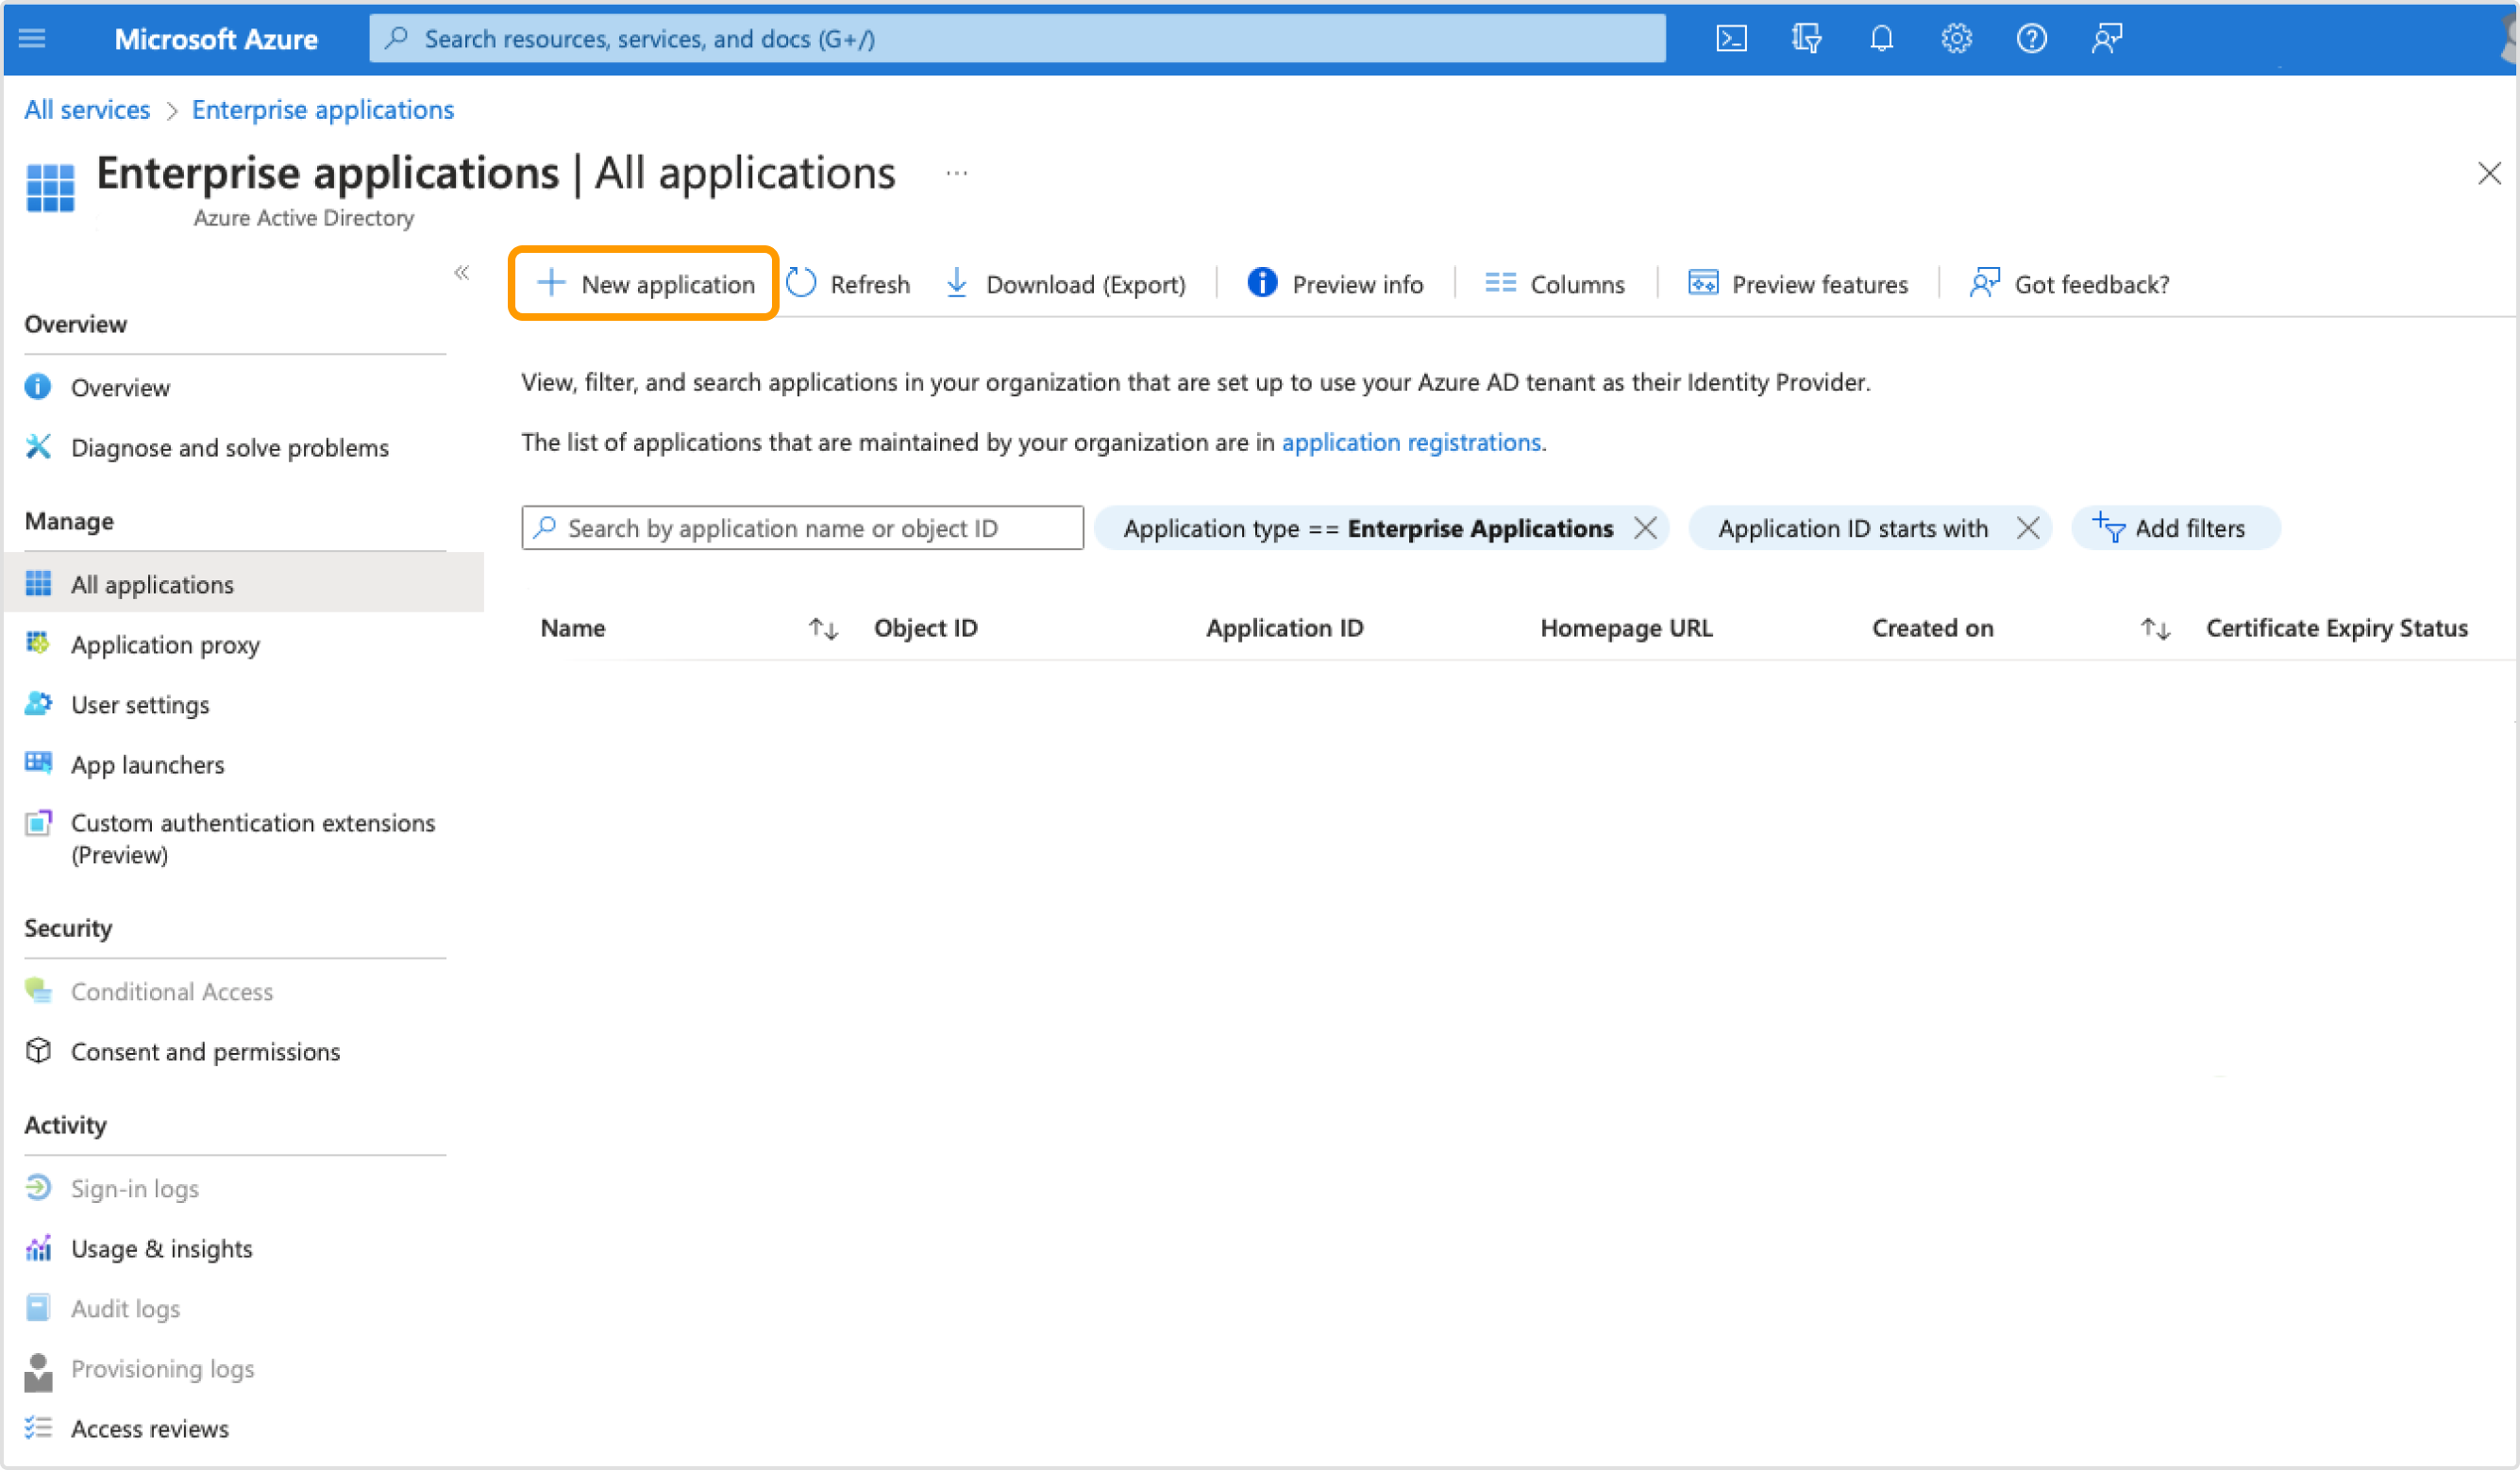
2. Find Enterprise Applications, and click on + New application.
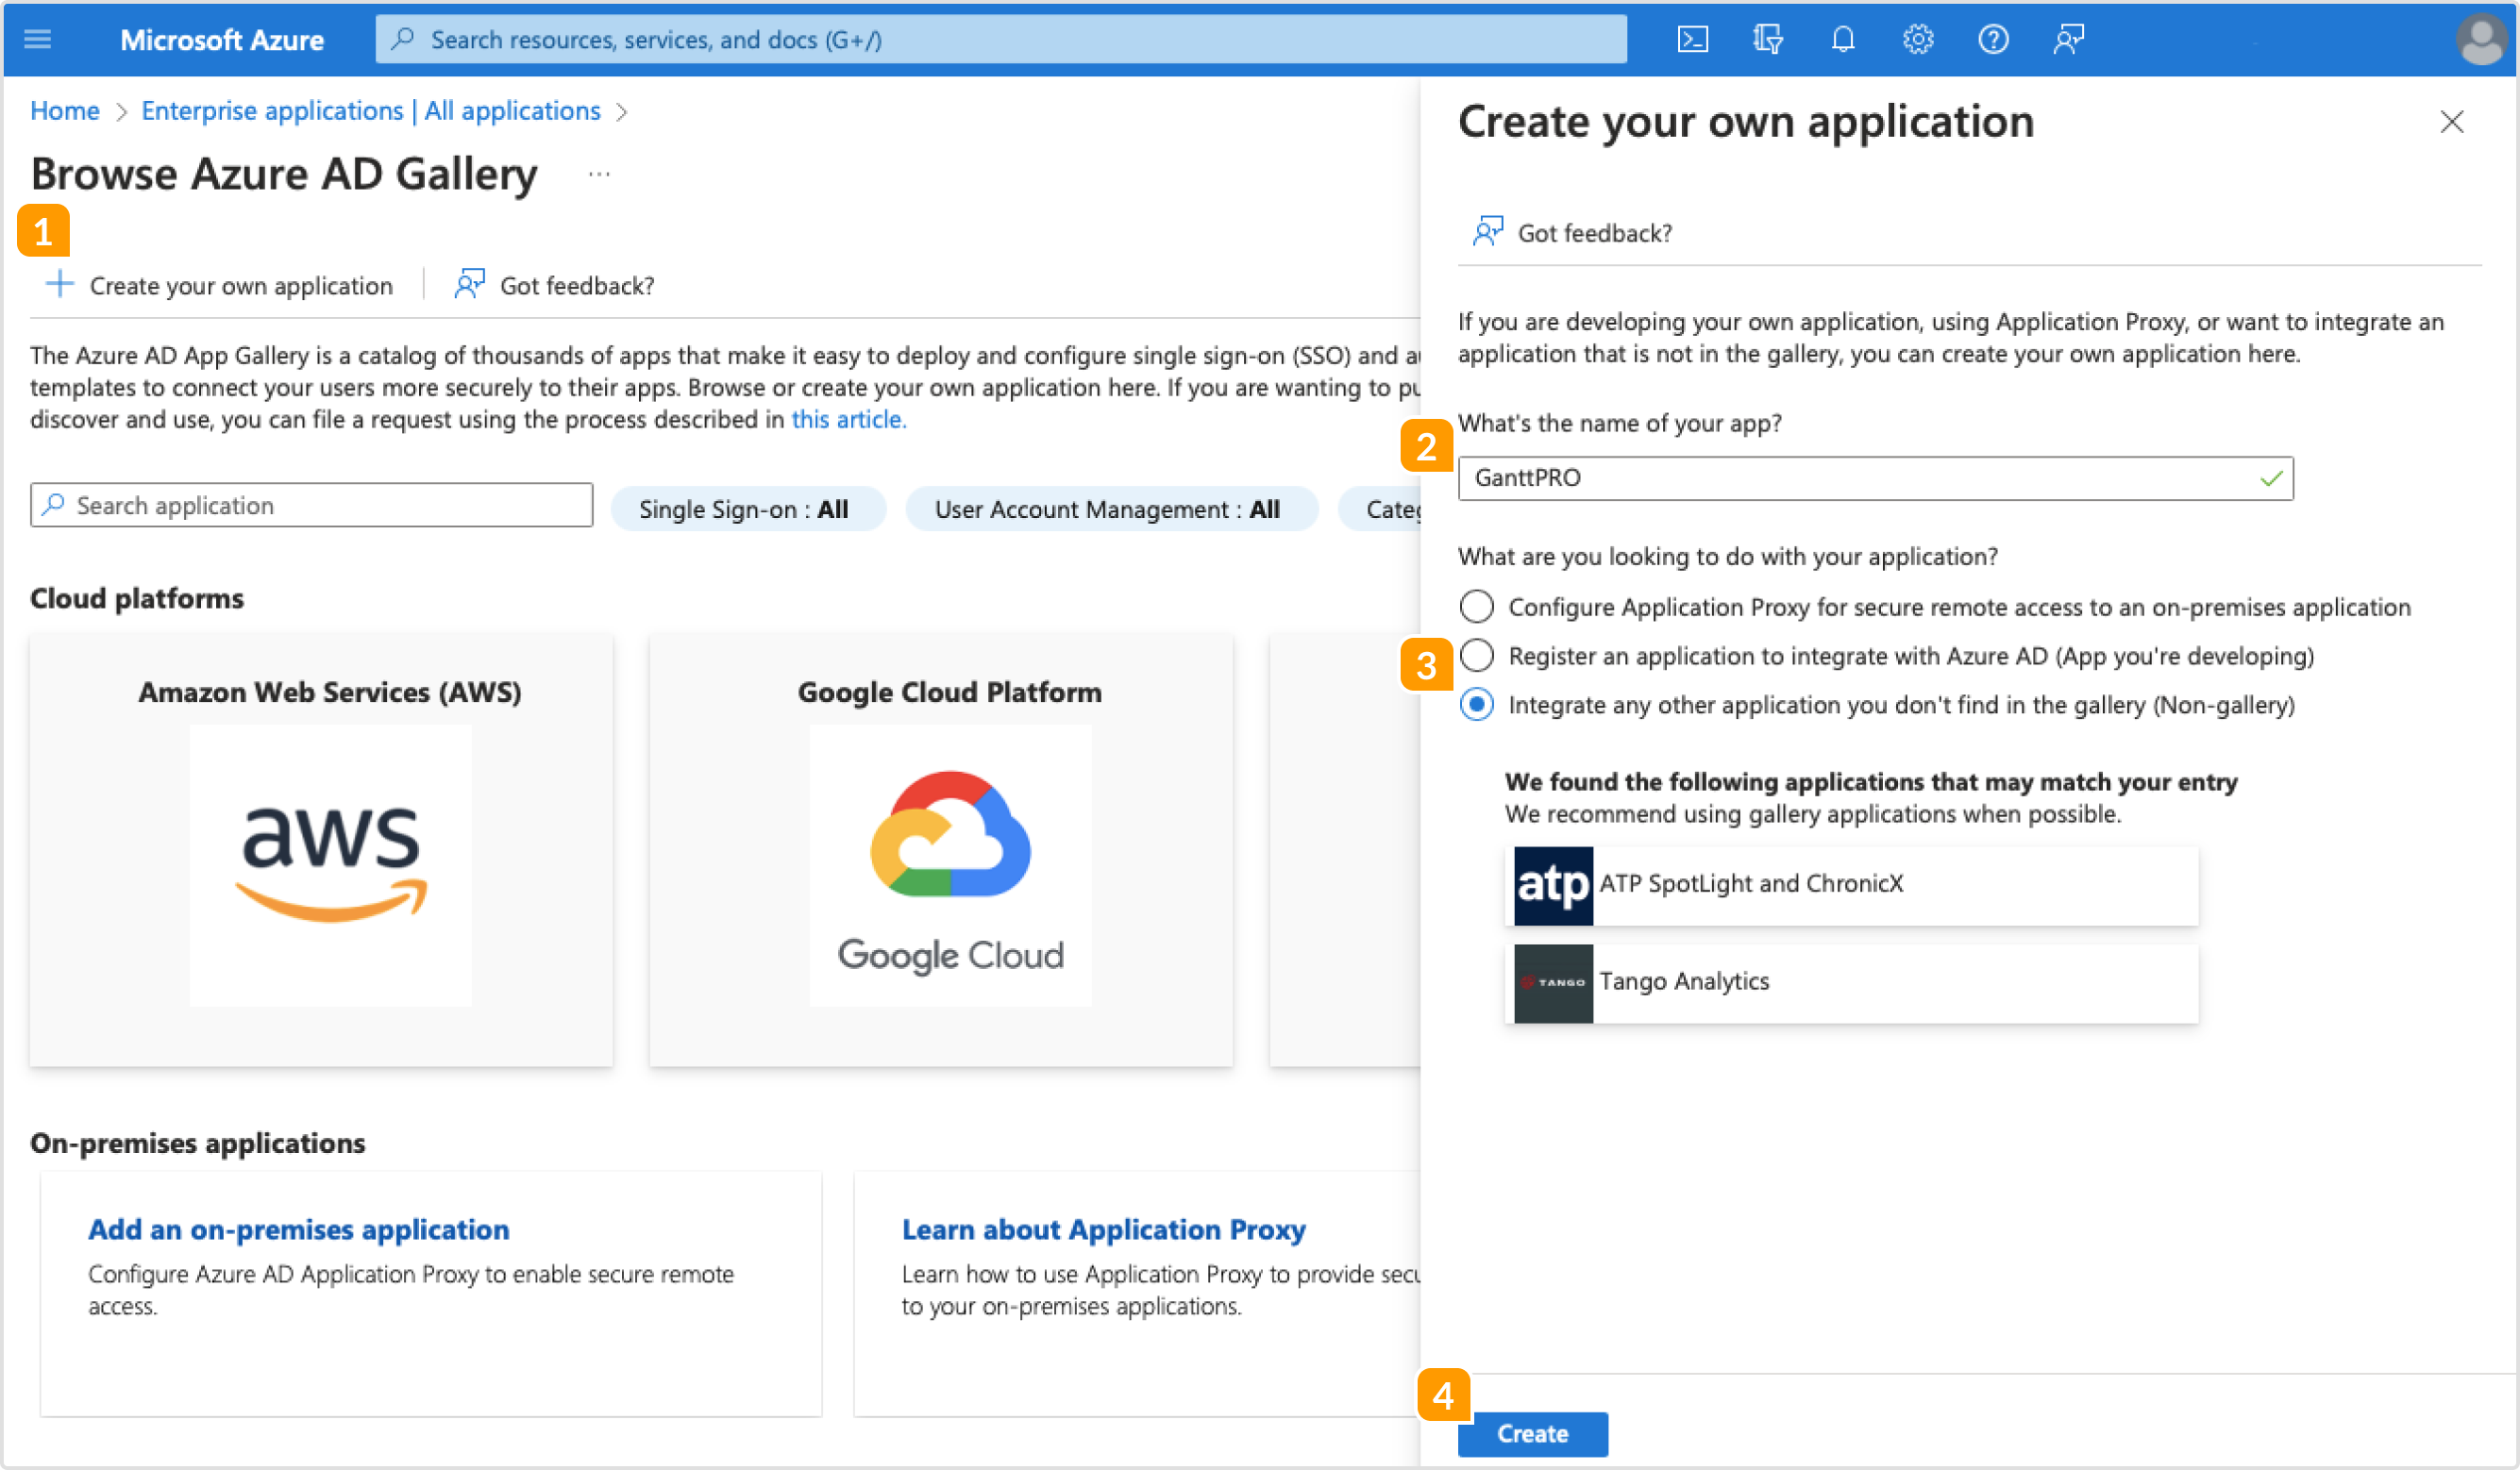
 3. Next, click + Create your own application 1, enter GanttPRO 2 as the name for the app, and select the Non-gallery 3 application.
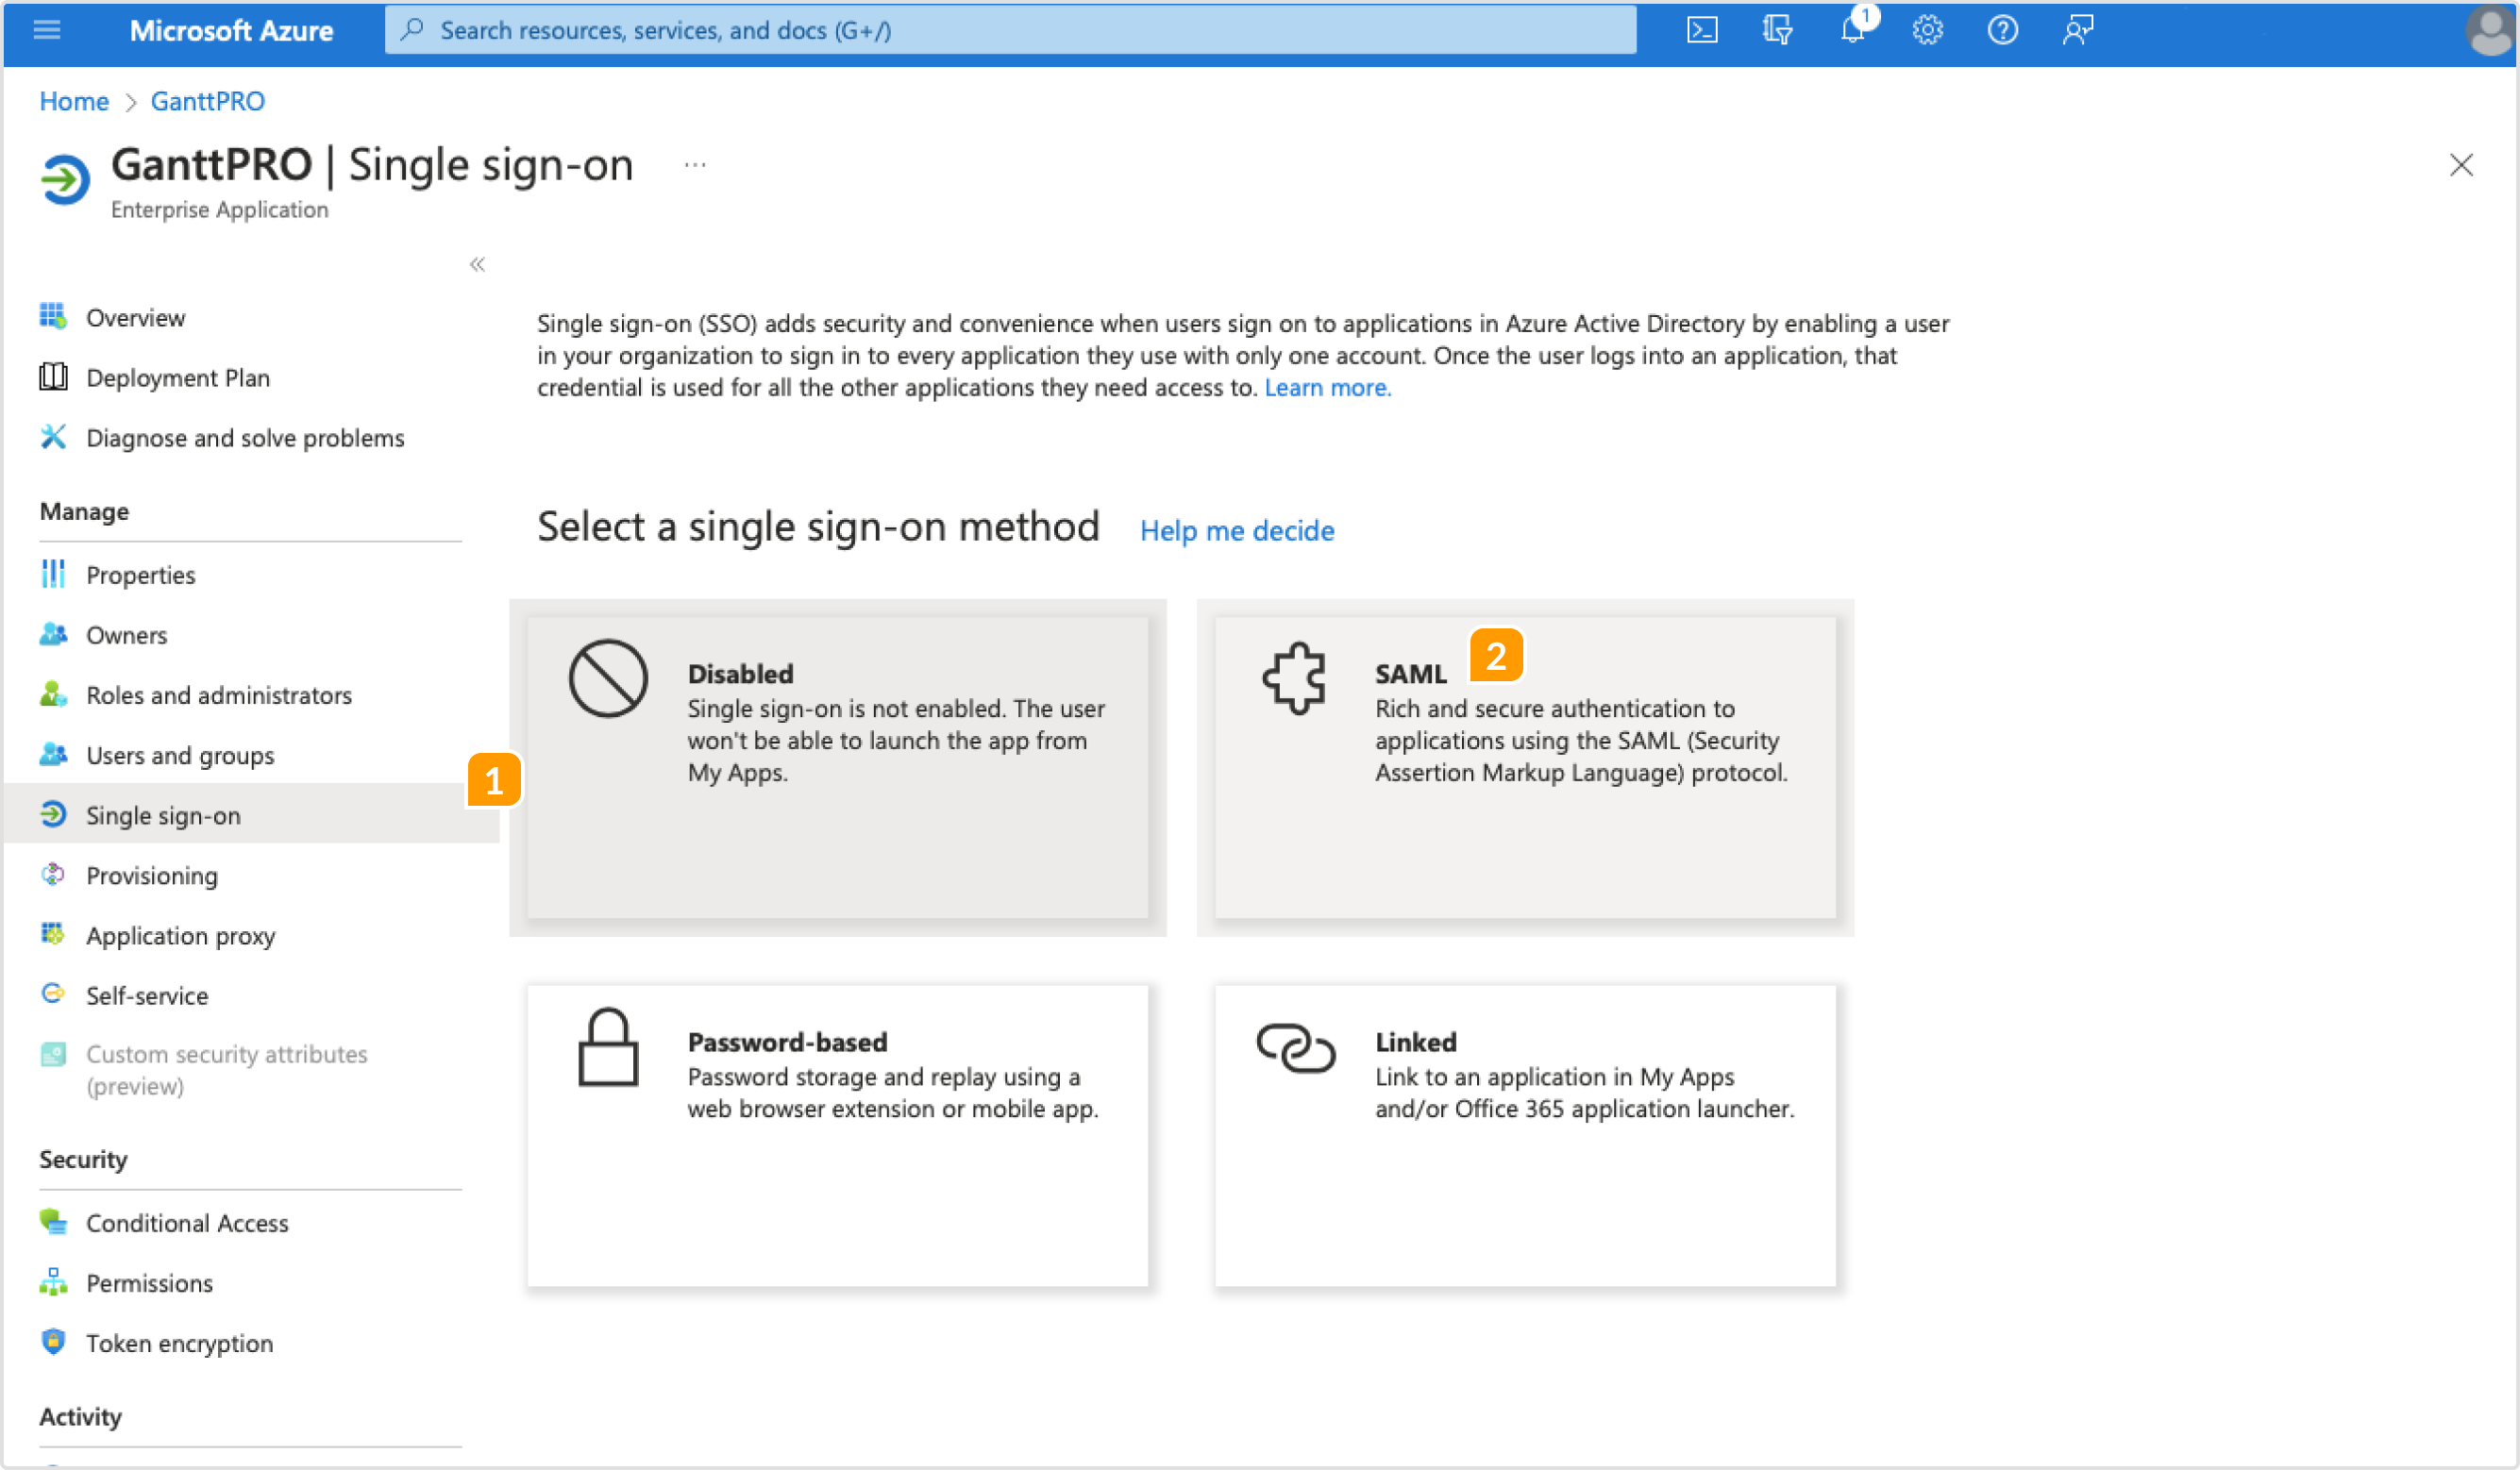
 4. Click on Single sign-on 1 on the left panel, and then select SAML 2.
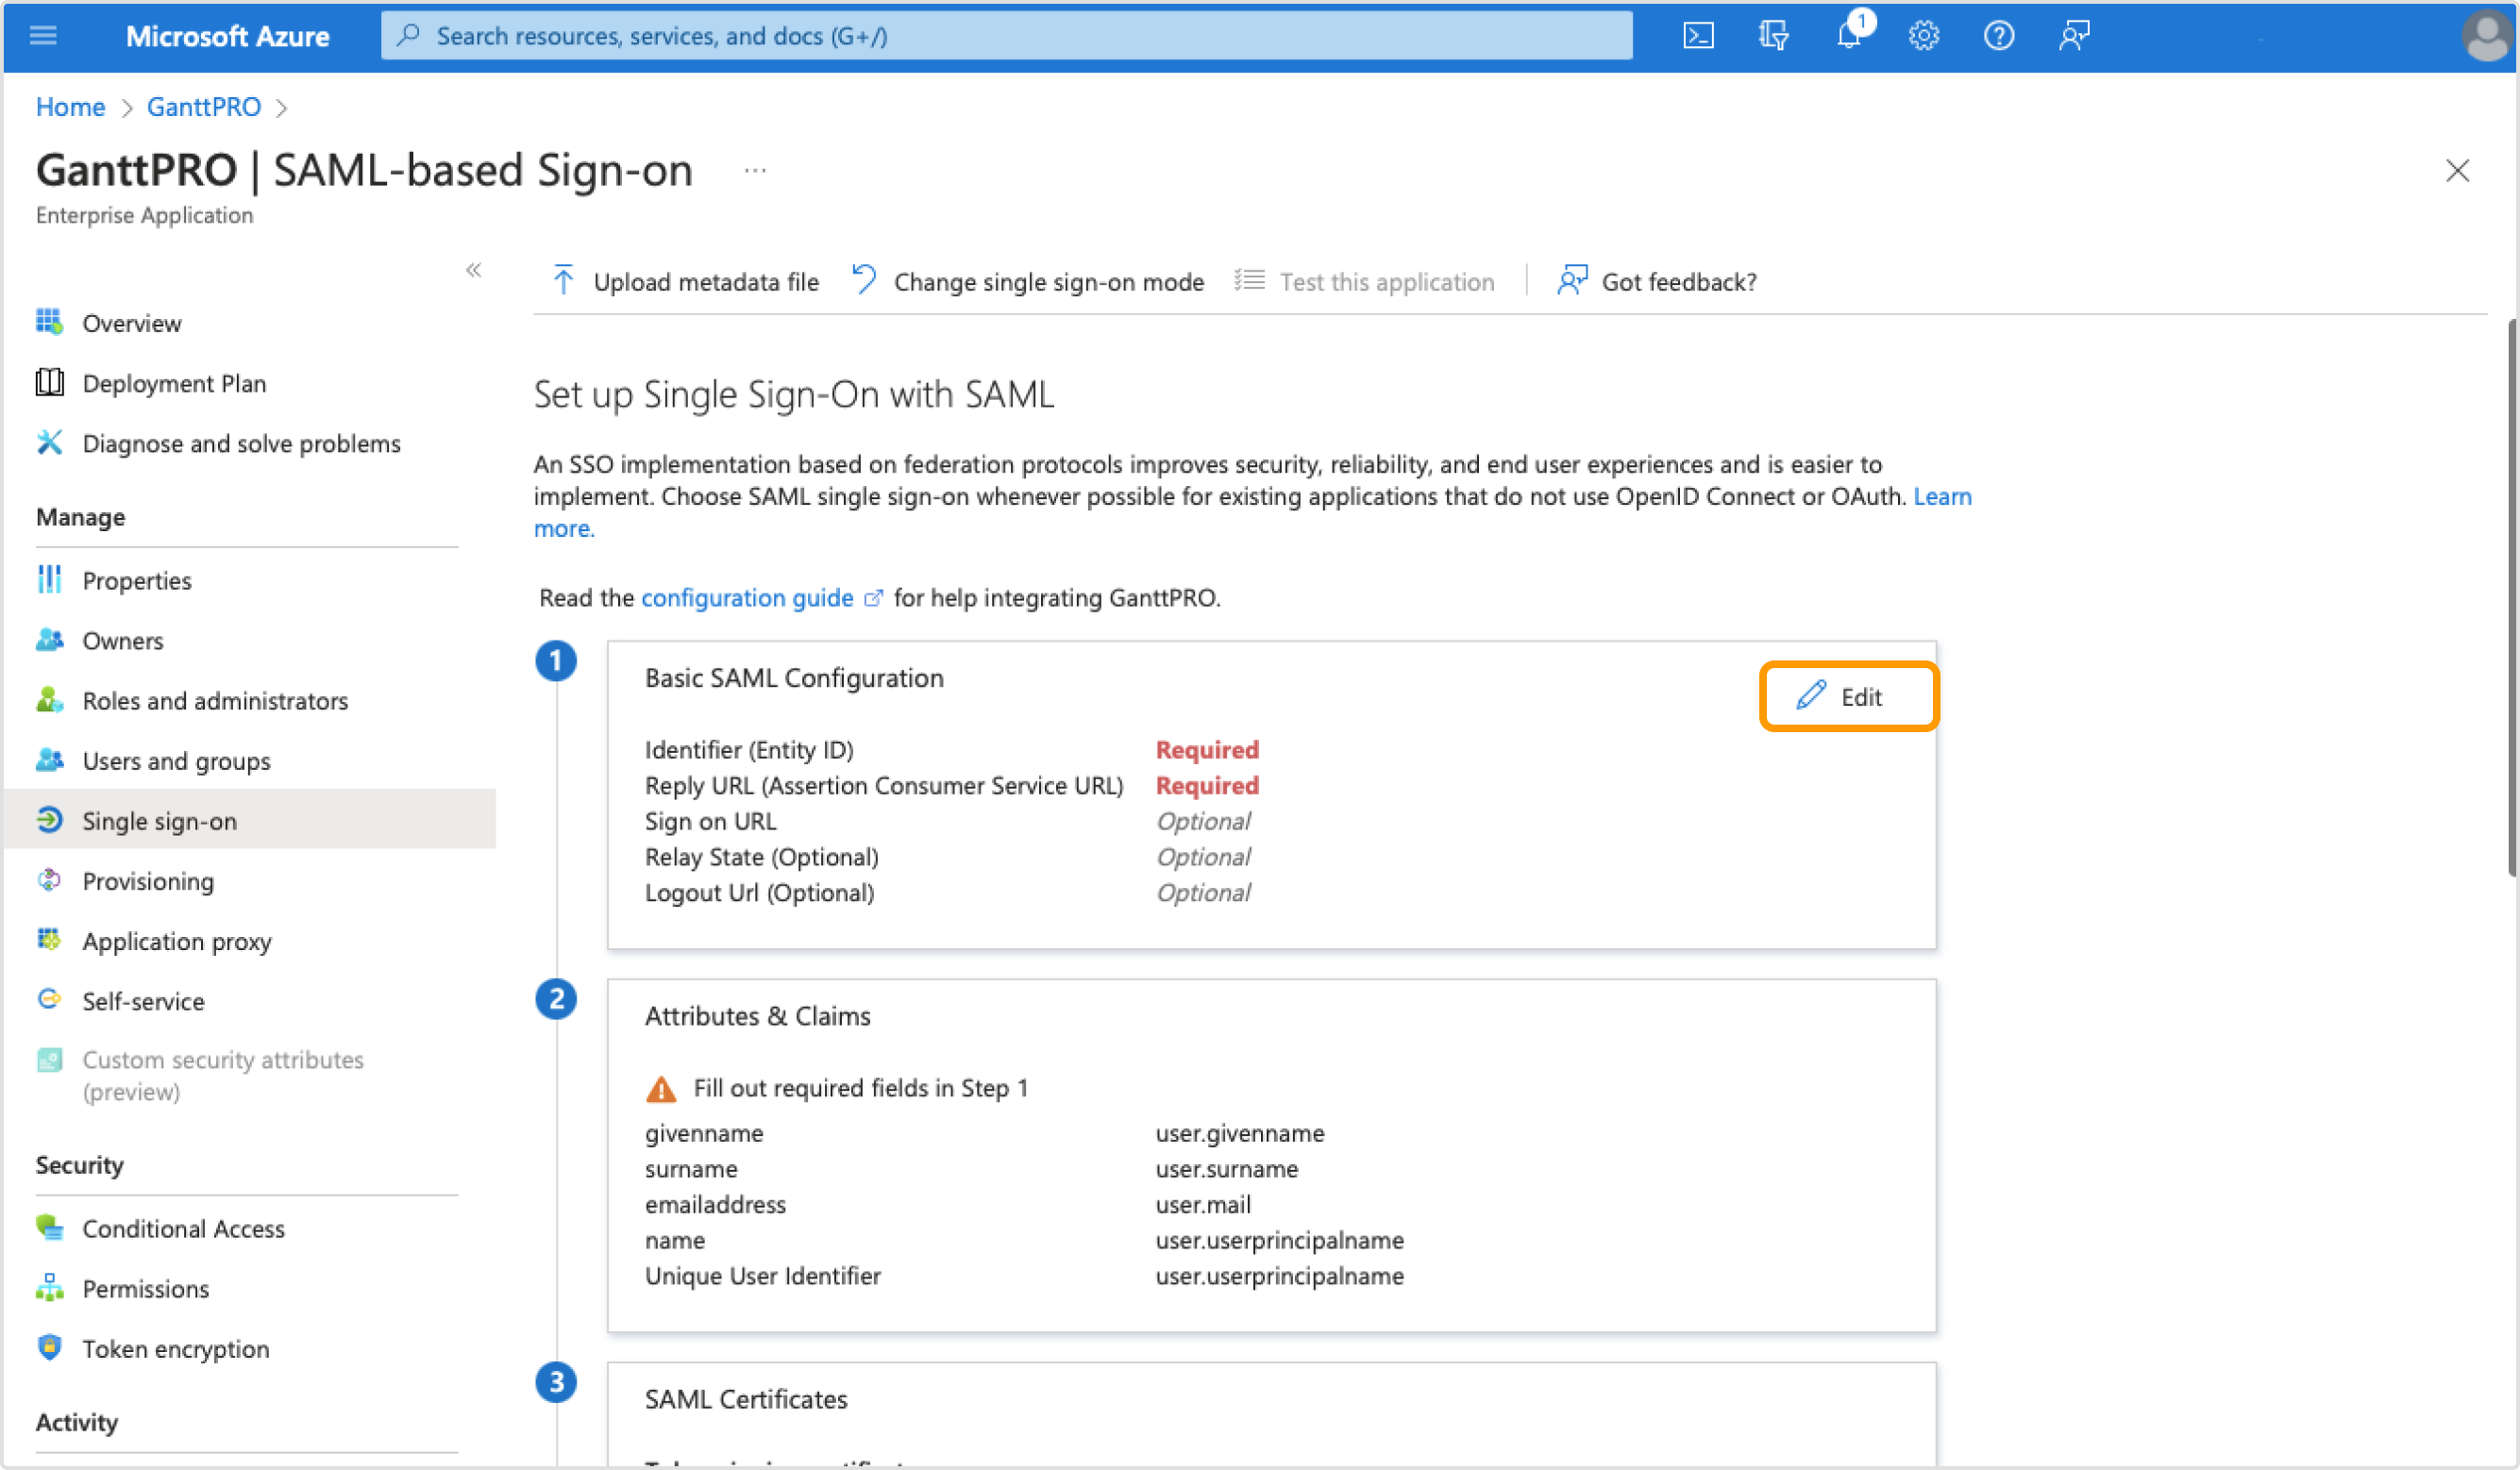
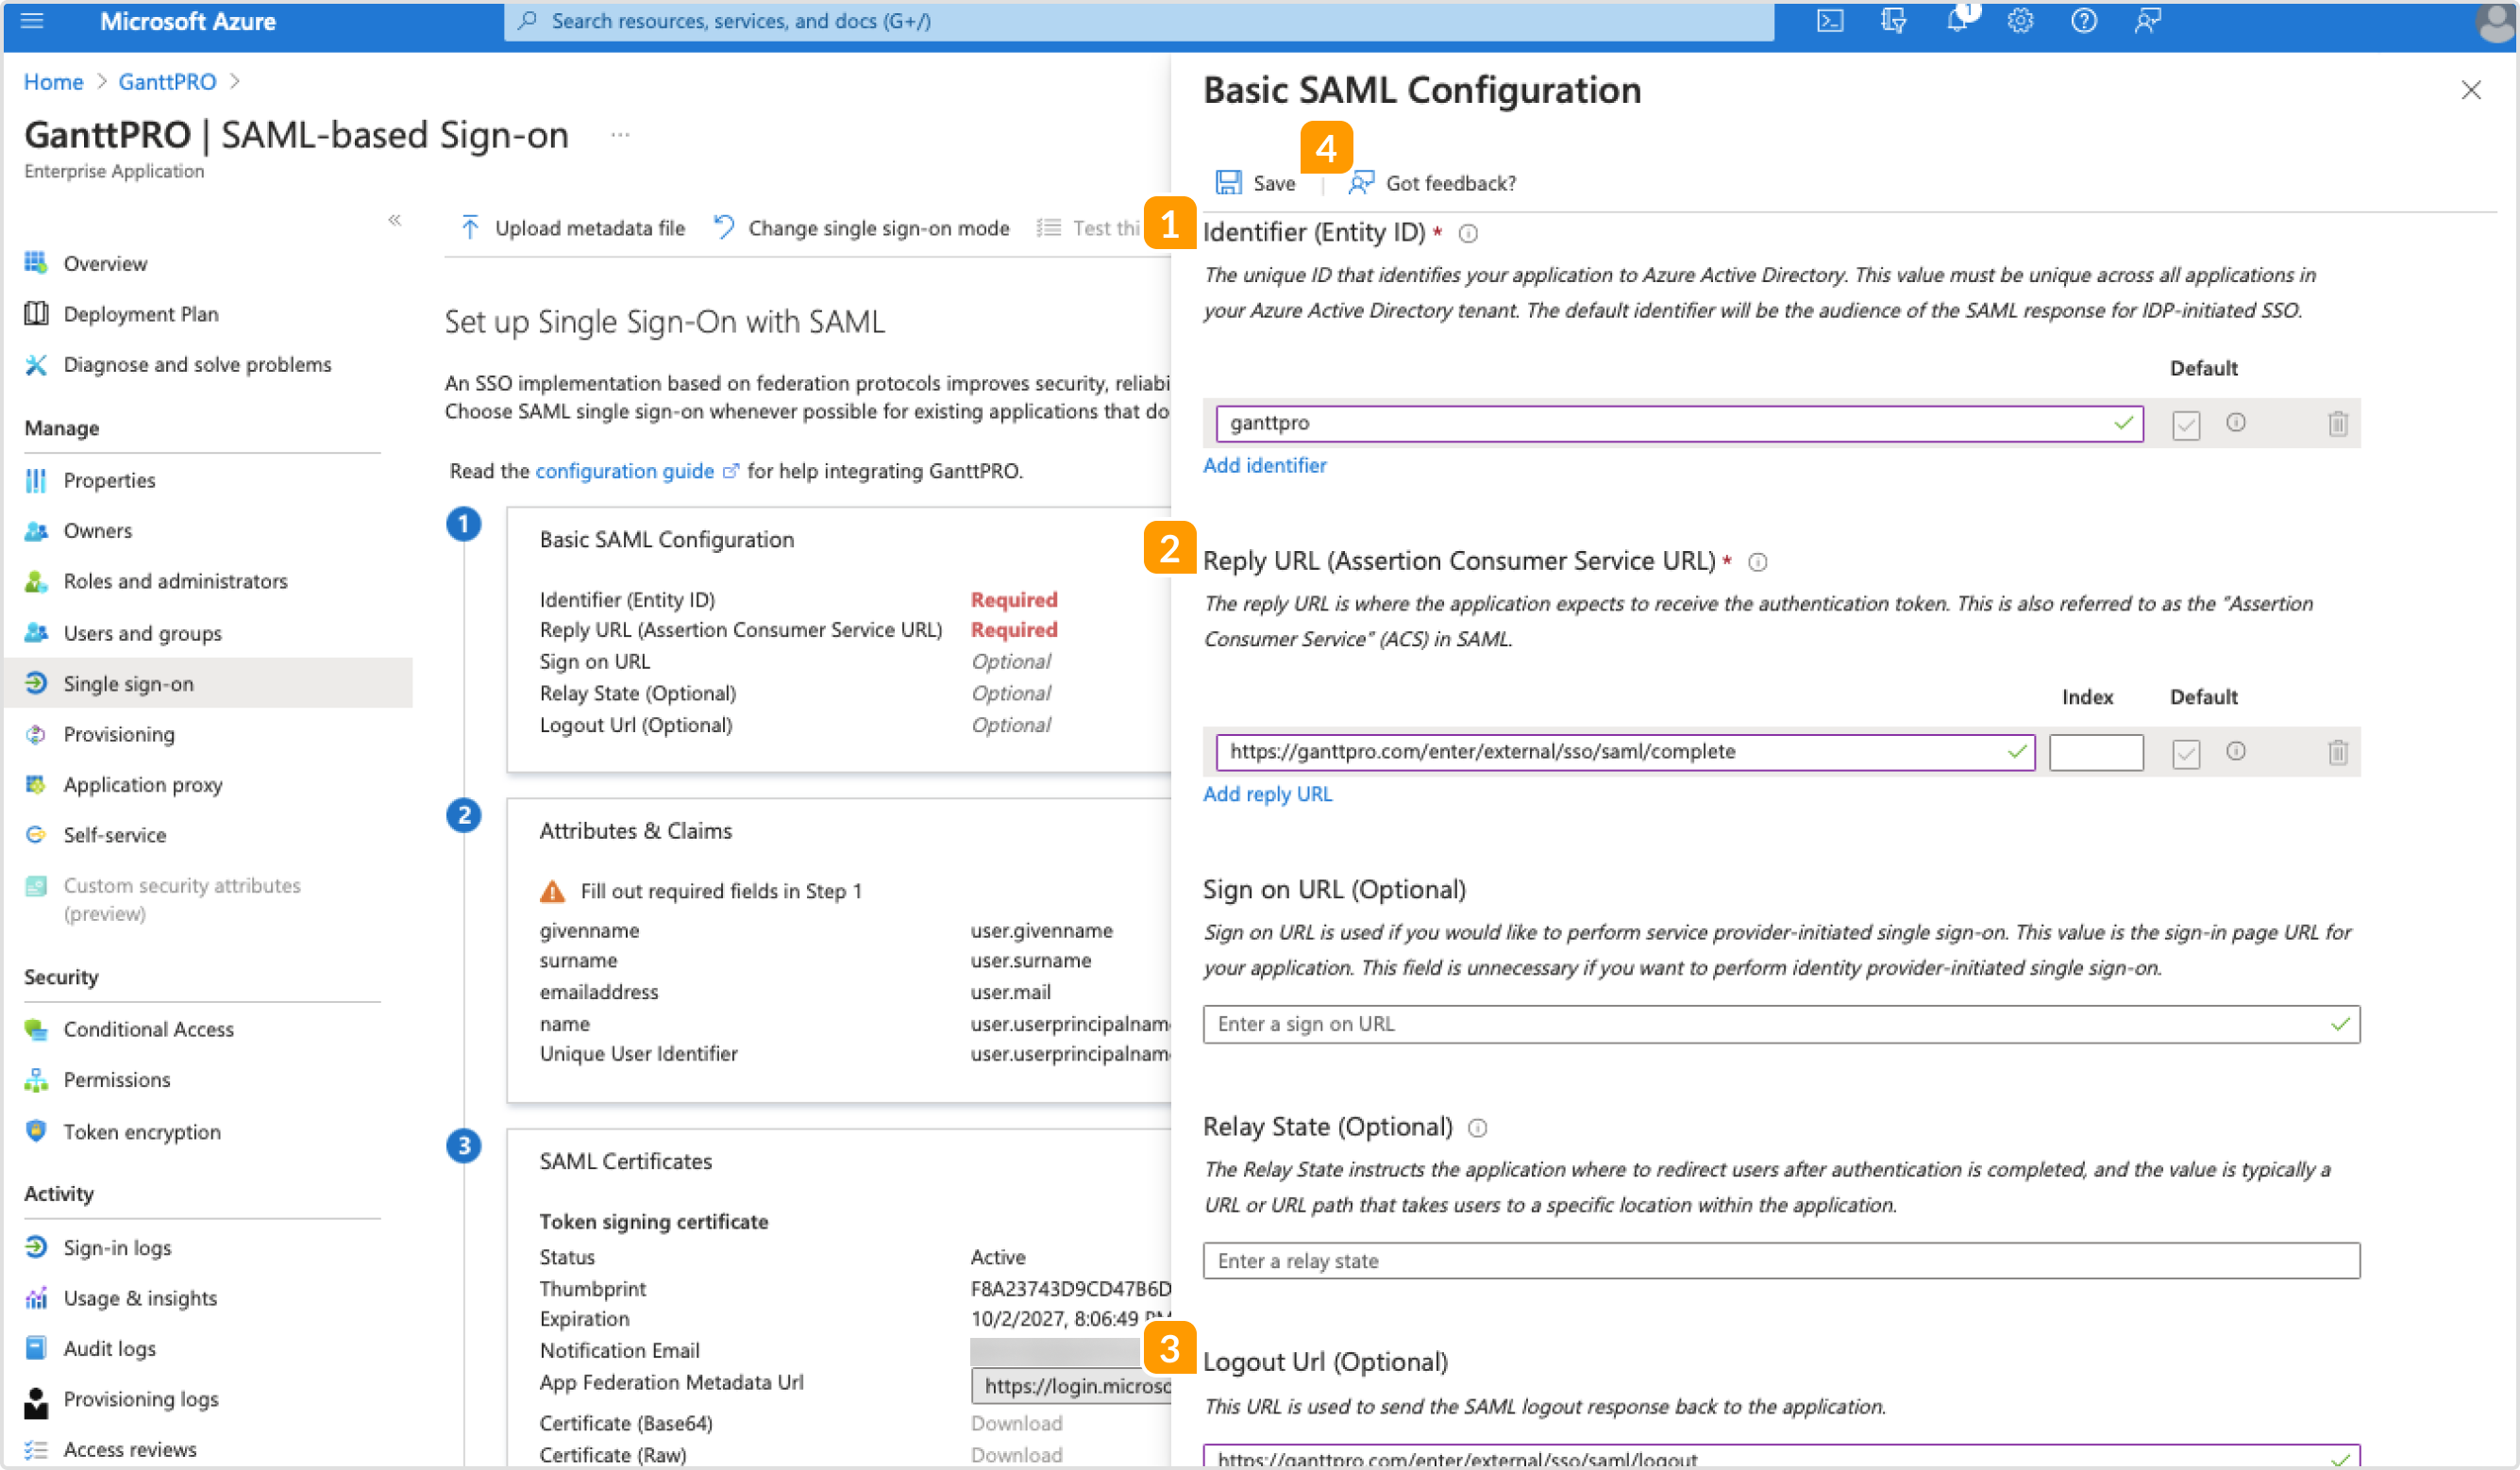
 5. In the next window, click on the edit icon for the Basic SAML Configuration block.
 6. In the emerging window, fill in the following fields:
1 Identifier (Entity ID) - ganttpro. Make it the default identifier and delete any other identifiers.
2 Reply URL (Assertion Consumer Service URL) - https://ganttpro.com/enter/external/sso/saml/complete
3 Logout URL - https://ganttpro.com/enter/external/sso/saml/logout
After that click on Save 4.
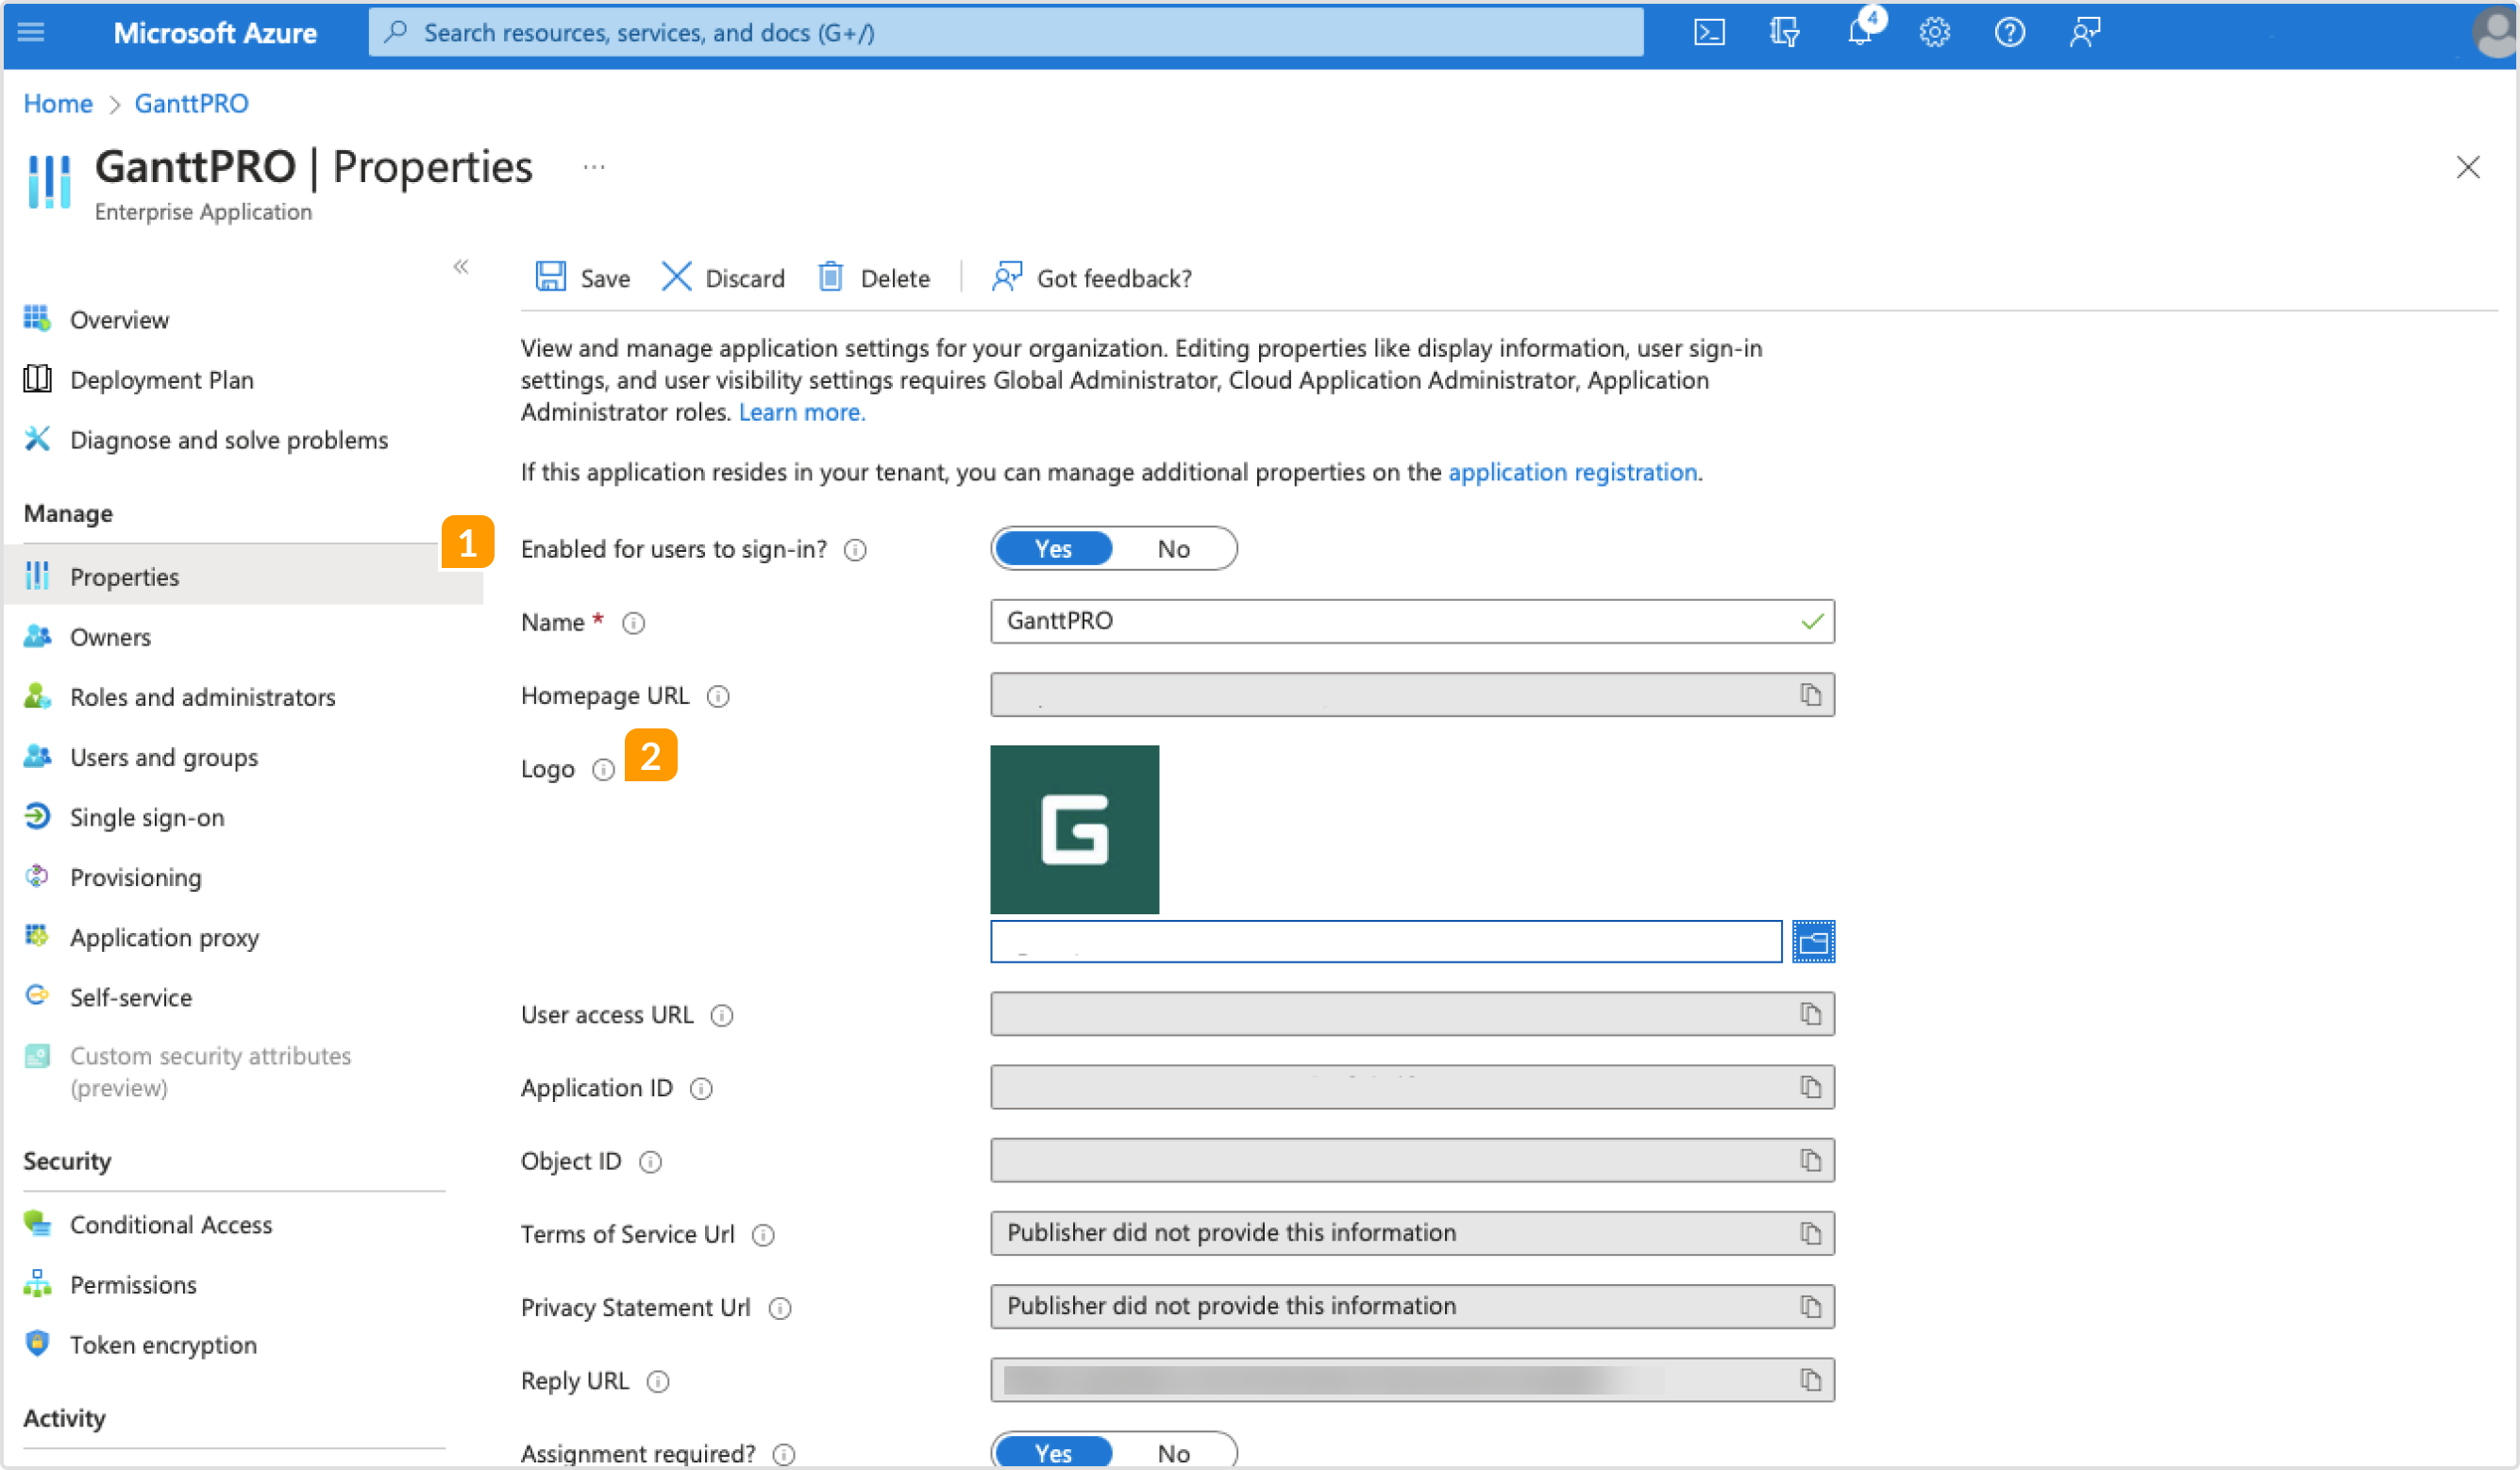
 You can also upload a GanttPRO logo in the Properties tab on the left panel, if necessary.
Second step: exchanging configuration details
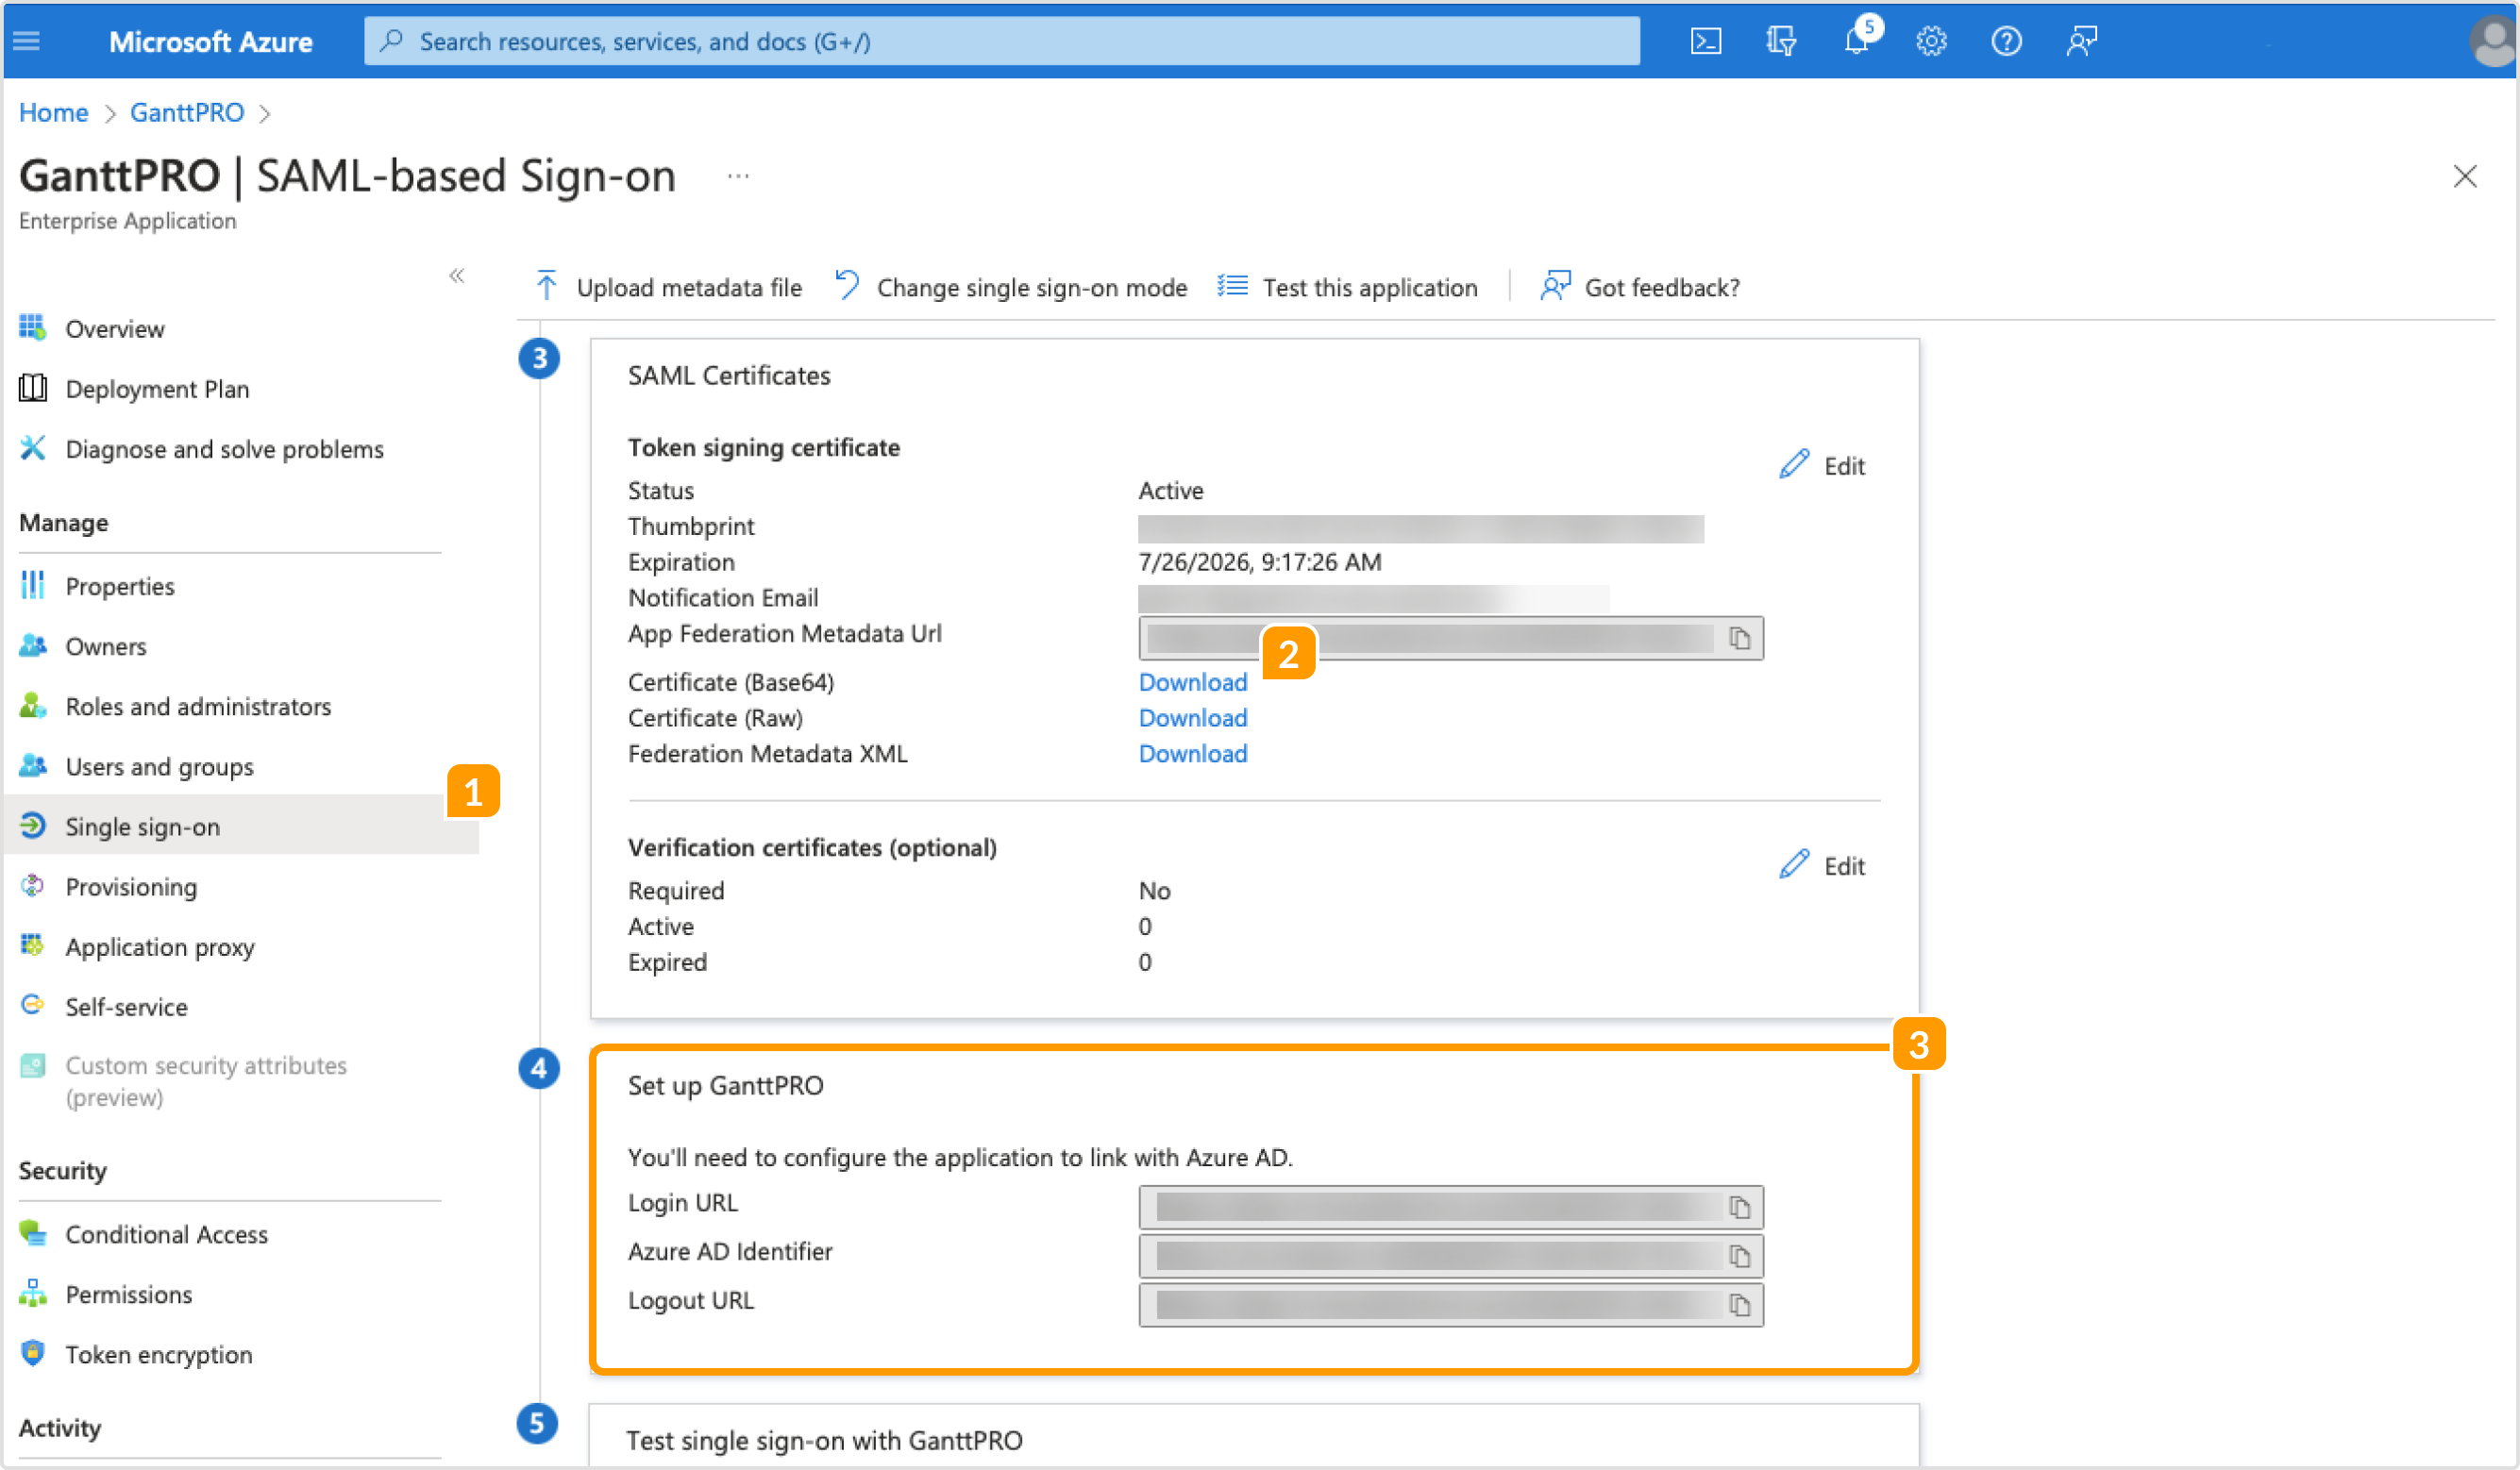
On the left panel, click on Single sign-on 1 and then on Download 2 for Certificate (Base64) in the SAML Signing Certificate block.
Go to Set up GanttPRO block 3, and copy the details below:
- Login URL
- Azure AD Identifier
- Logout URL
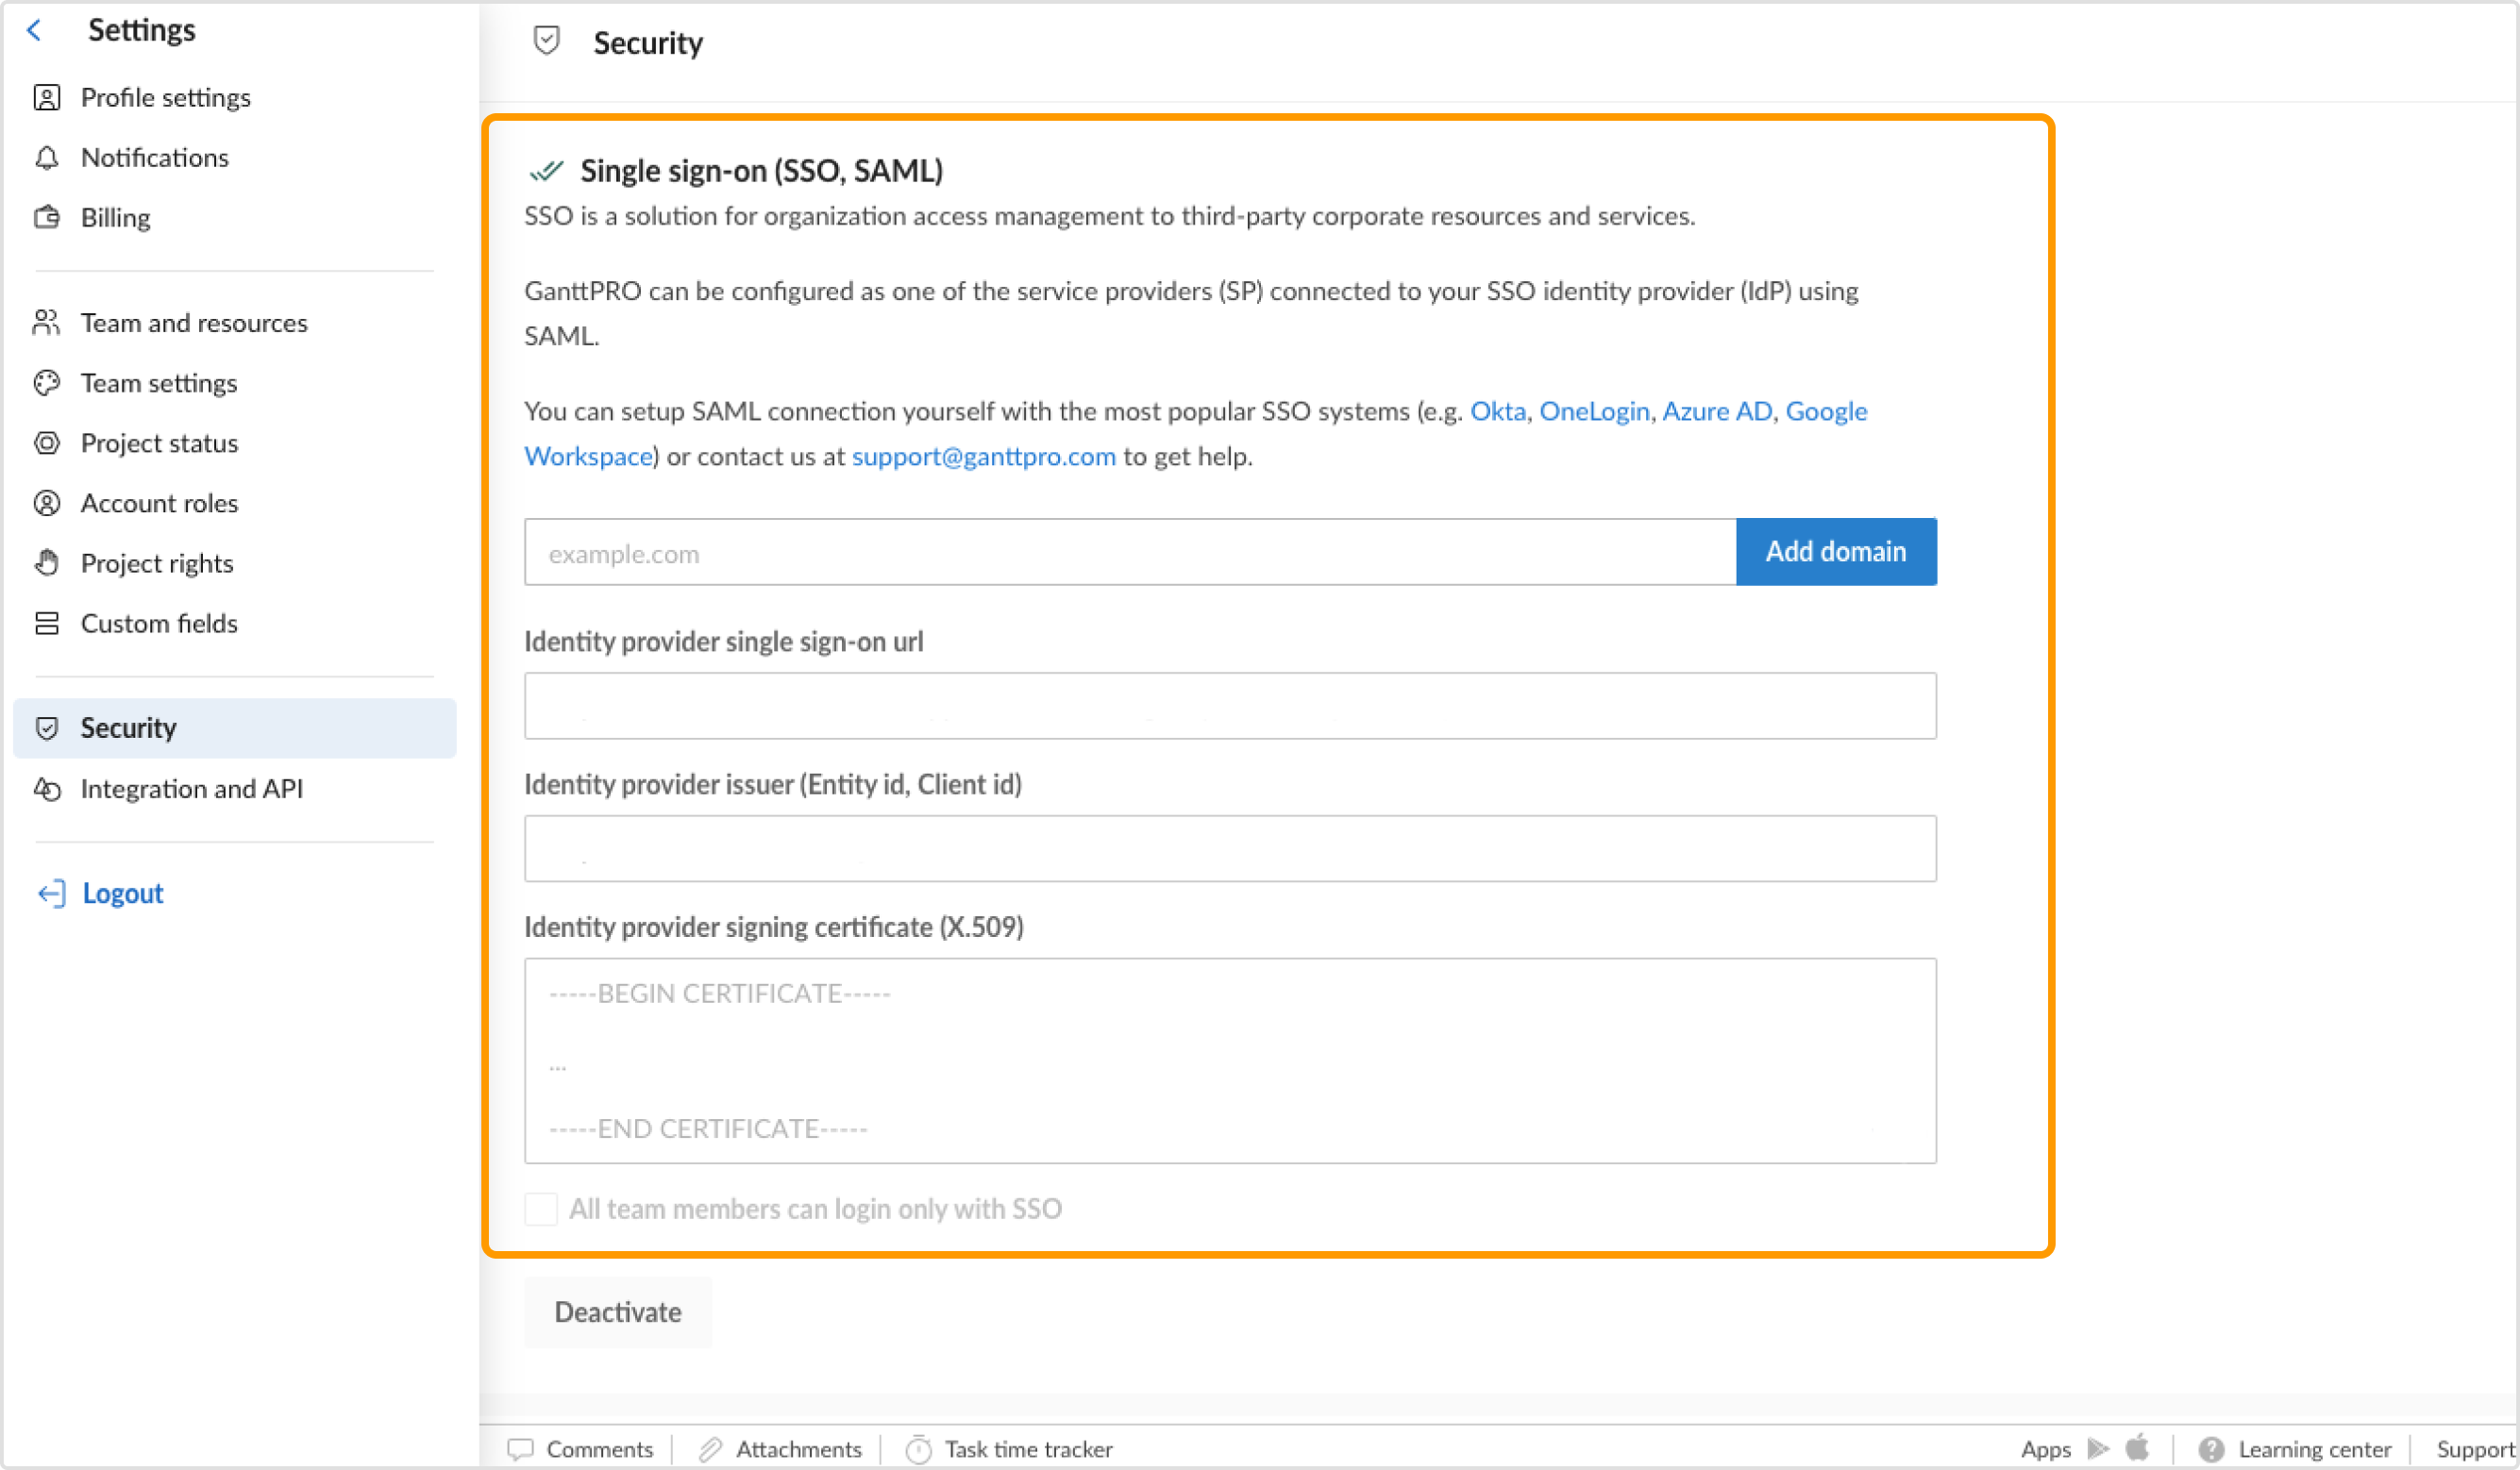
 After that, open the Account settings in GanttPRO web based Gantt chart app and select Security. Introduce those details in the Single sign-on (SSO, SAML) window to set up SSO for your GanttPRO account. Once you set up SSO for your account, you will be able to log in both ways: through the GanttPRO main page and Azure AD.
Third step: adding users to the GanttPRO application
From the side of Azure AD admin
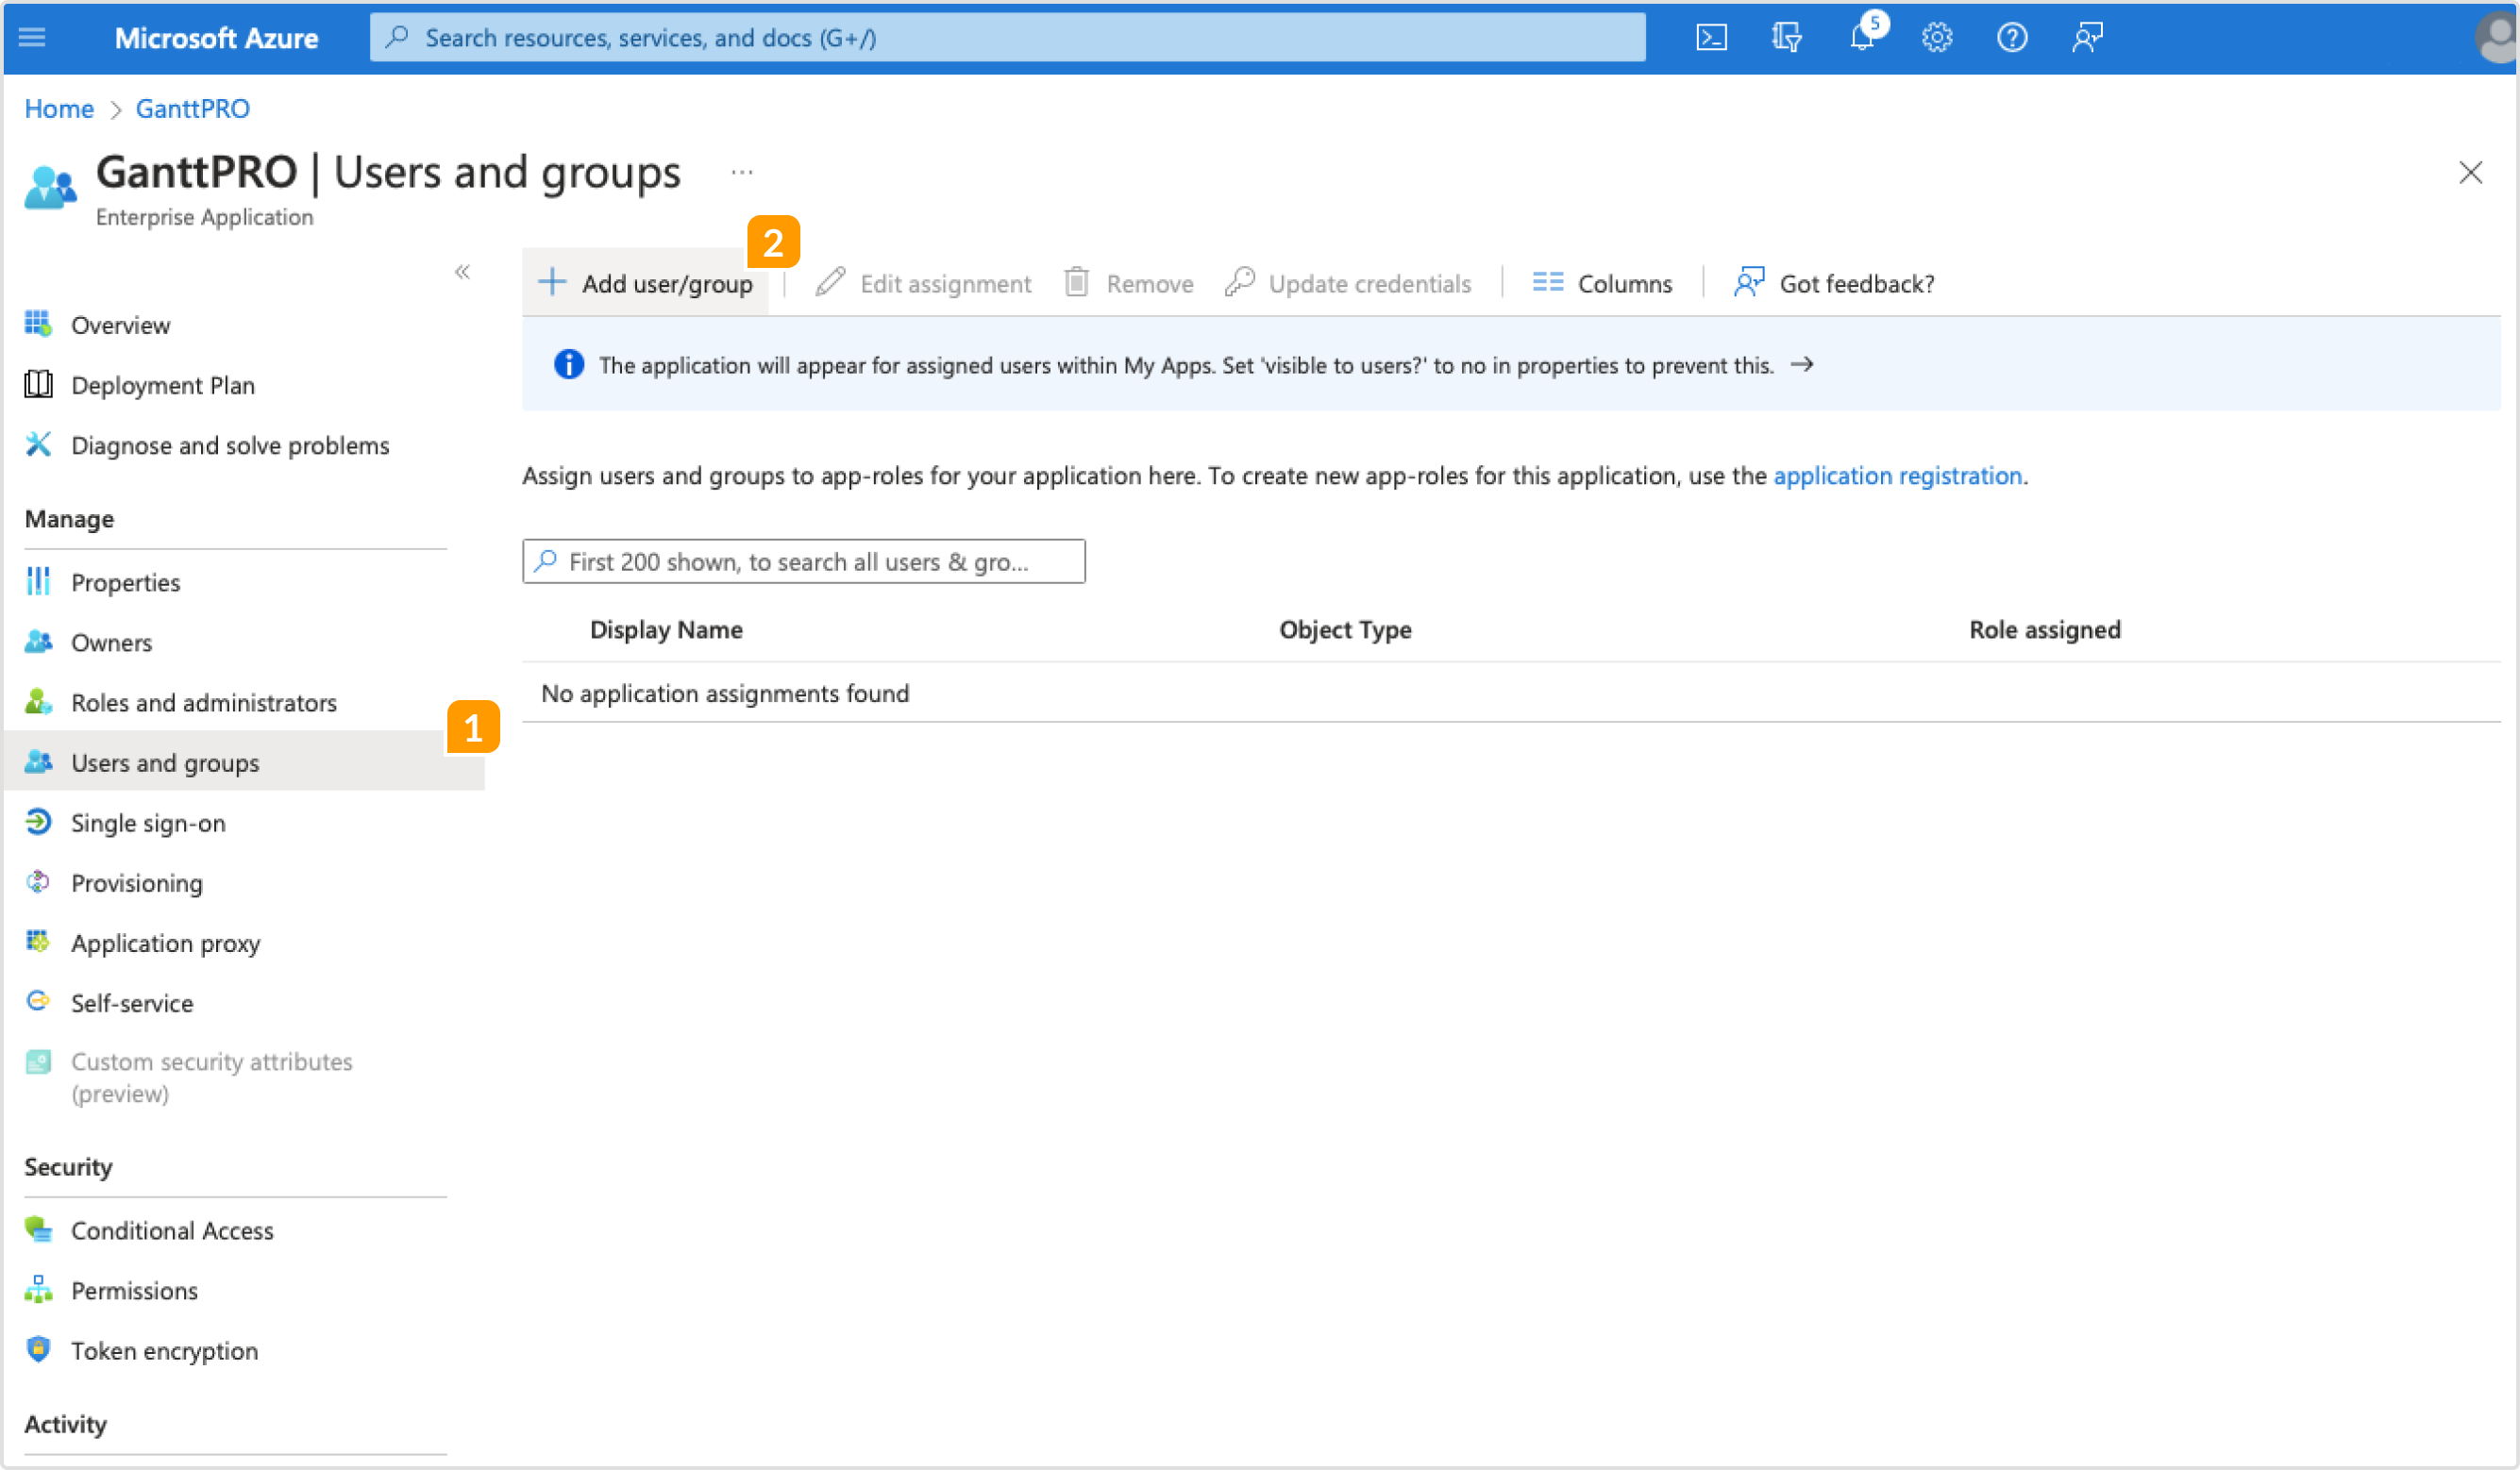
1. On the left panel choose Users and Groups tab 1 and click on +Add user/group 2.
 2. Click on Users 1 and check the box 2 for the user you want to invite. Click on Select 3.
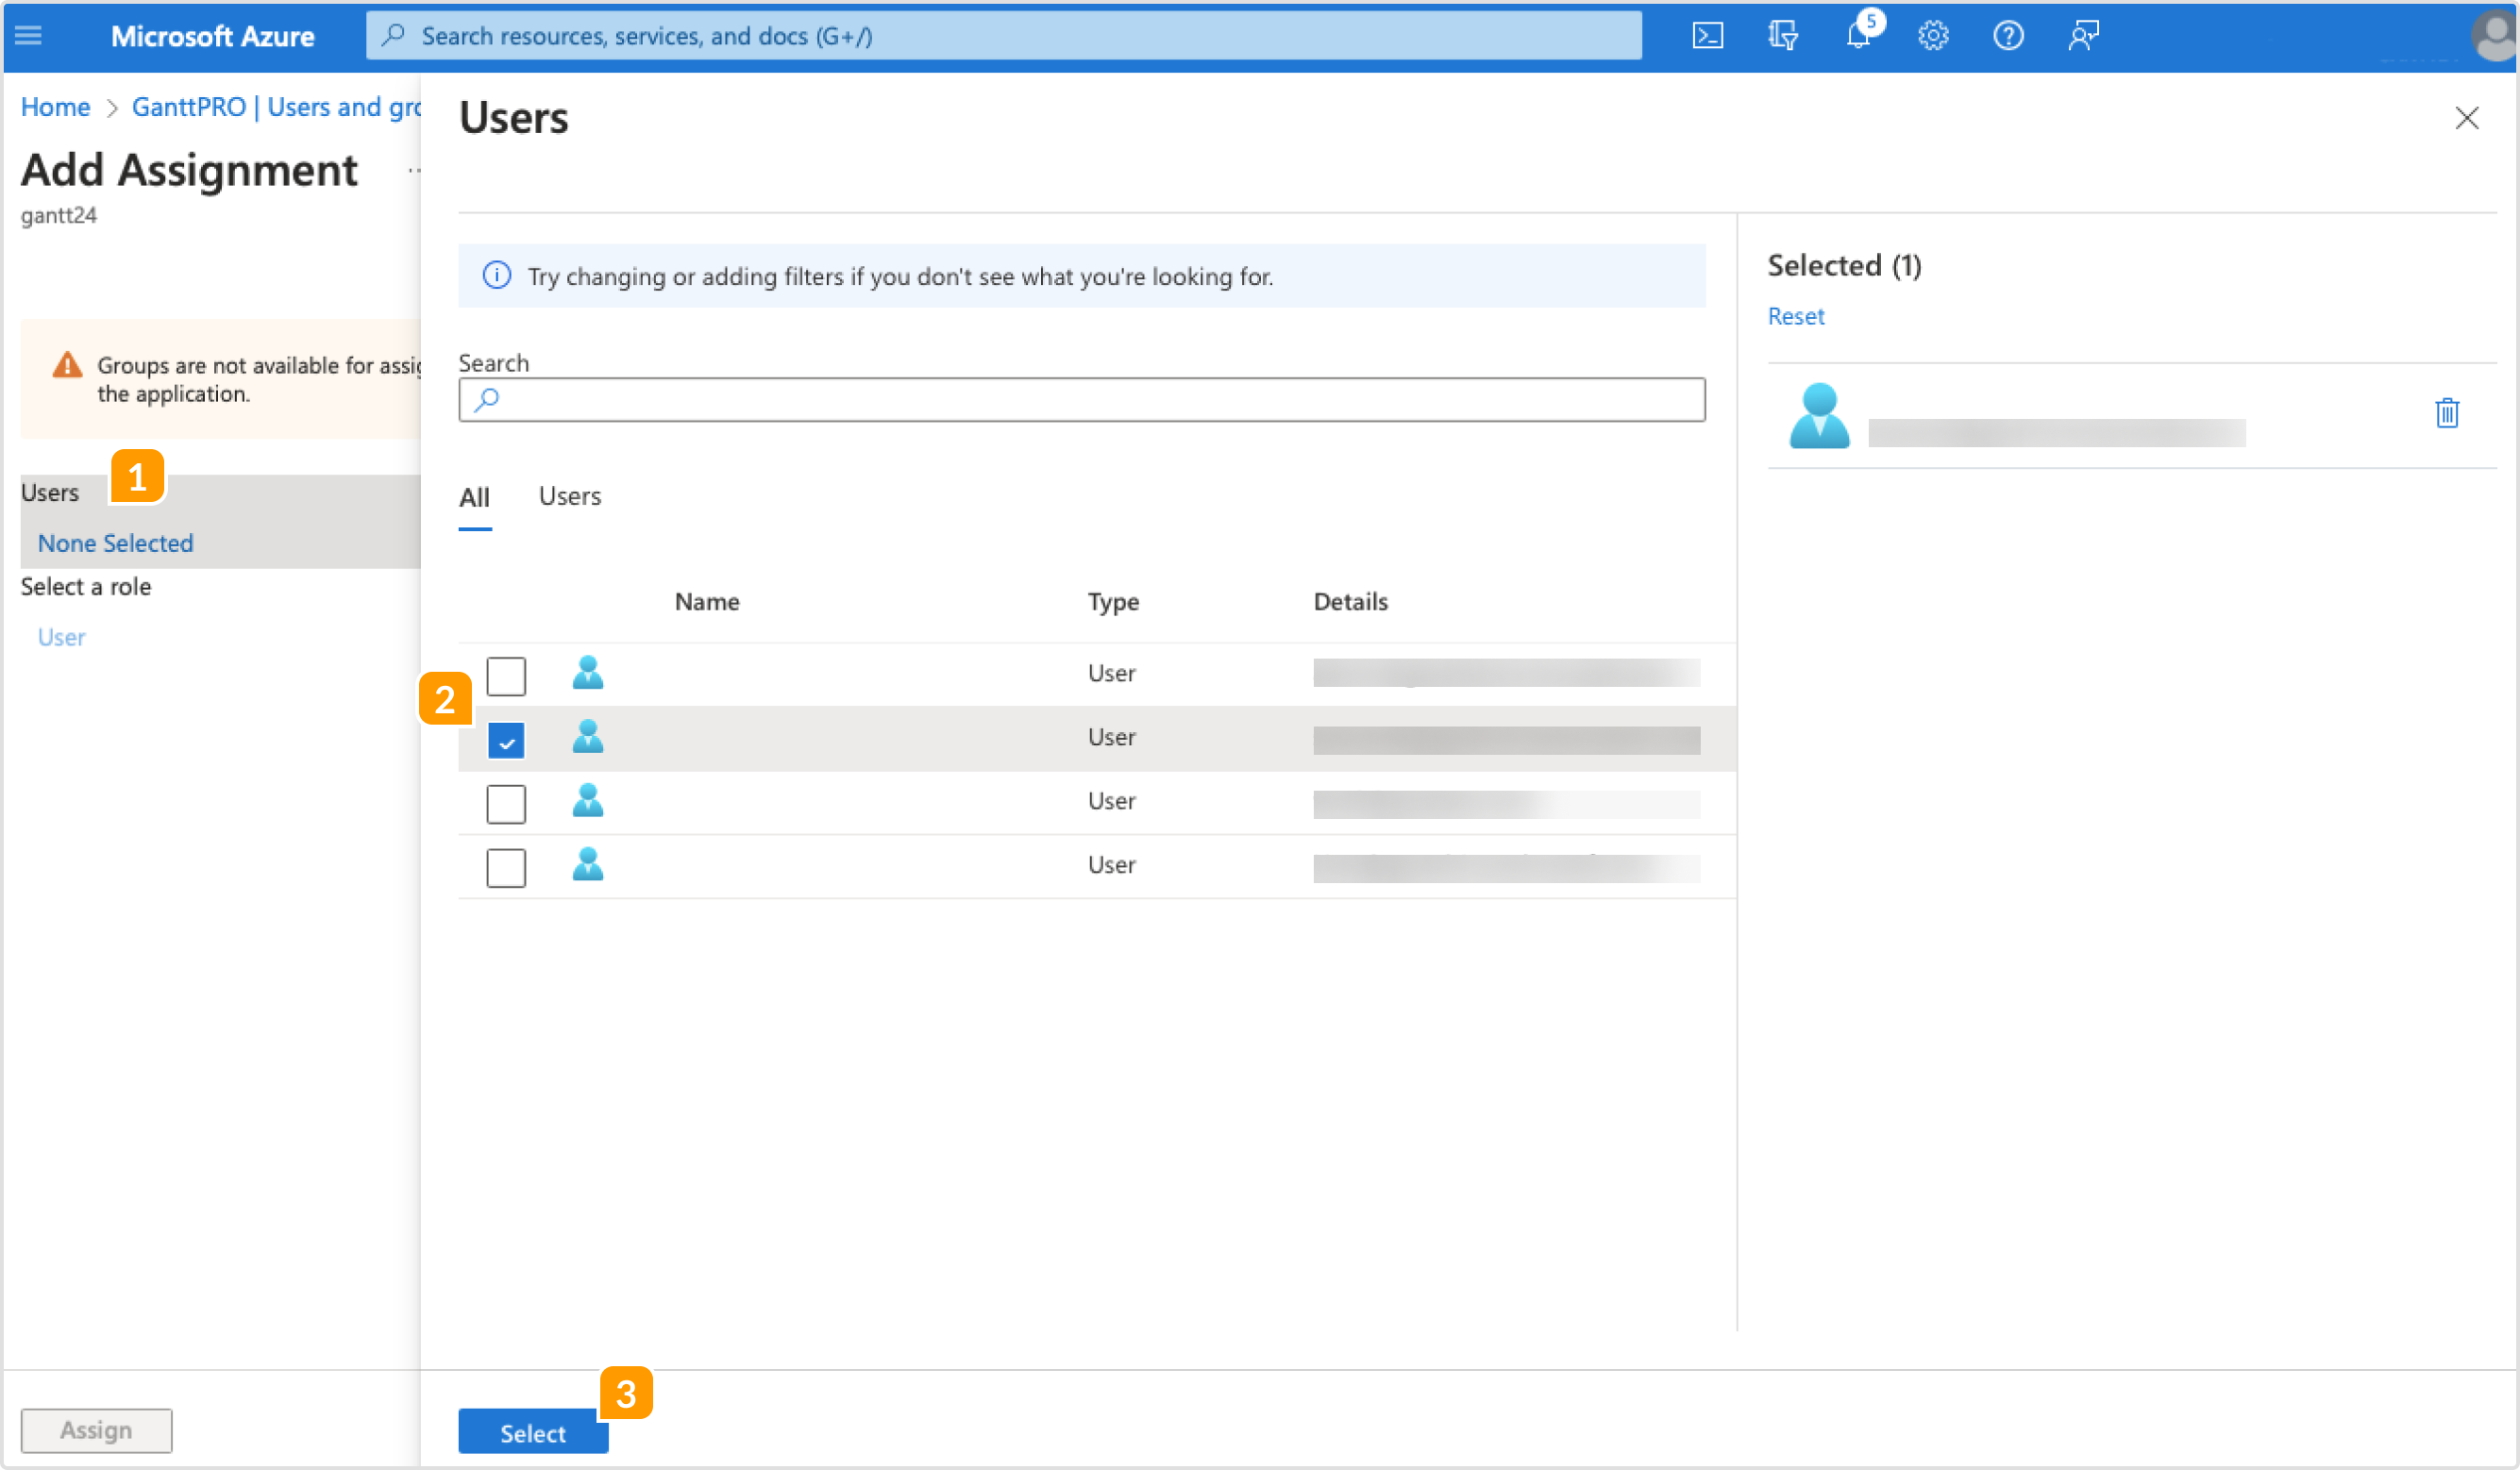
In the next window, click on the Assign button.
Please note that in Azure AD users should be added to the GanttPRO application with the same email address that they used to register in GanttPRO. Please email our Support team at support@ganttpro.com if you need to update your email address on file.
From the side of the added user
An added user can go to My Apps in Azure AD and quickly access the GanttPRO application.
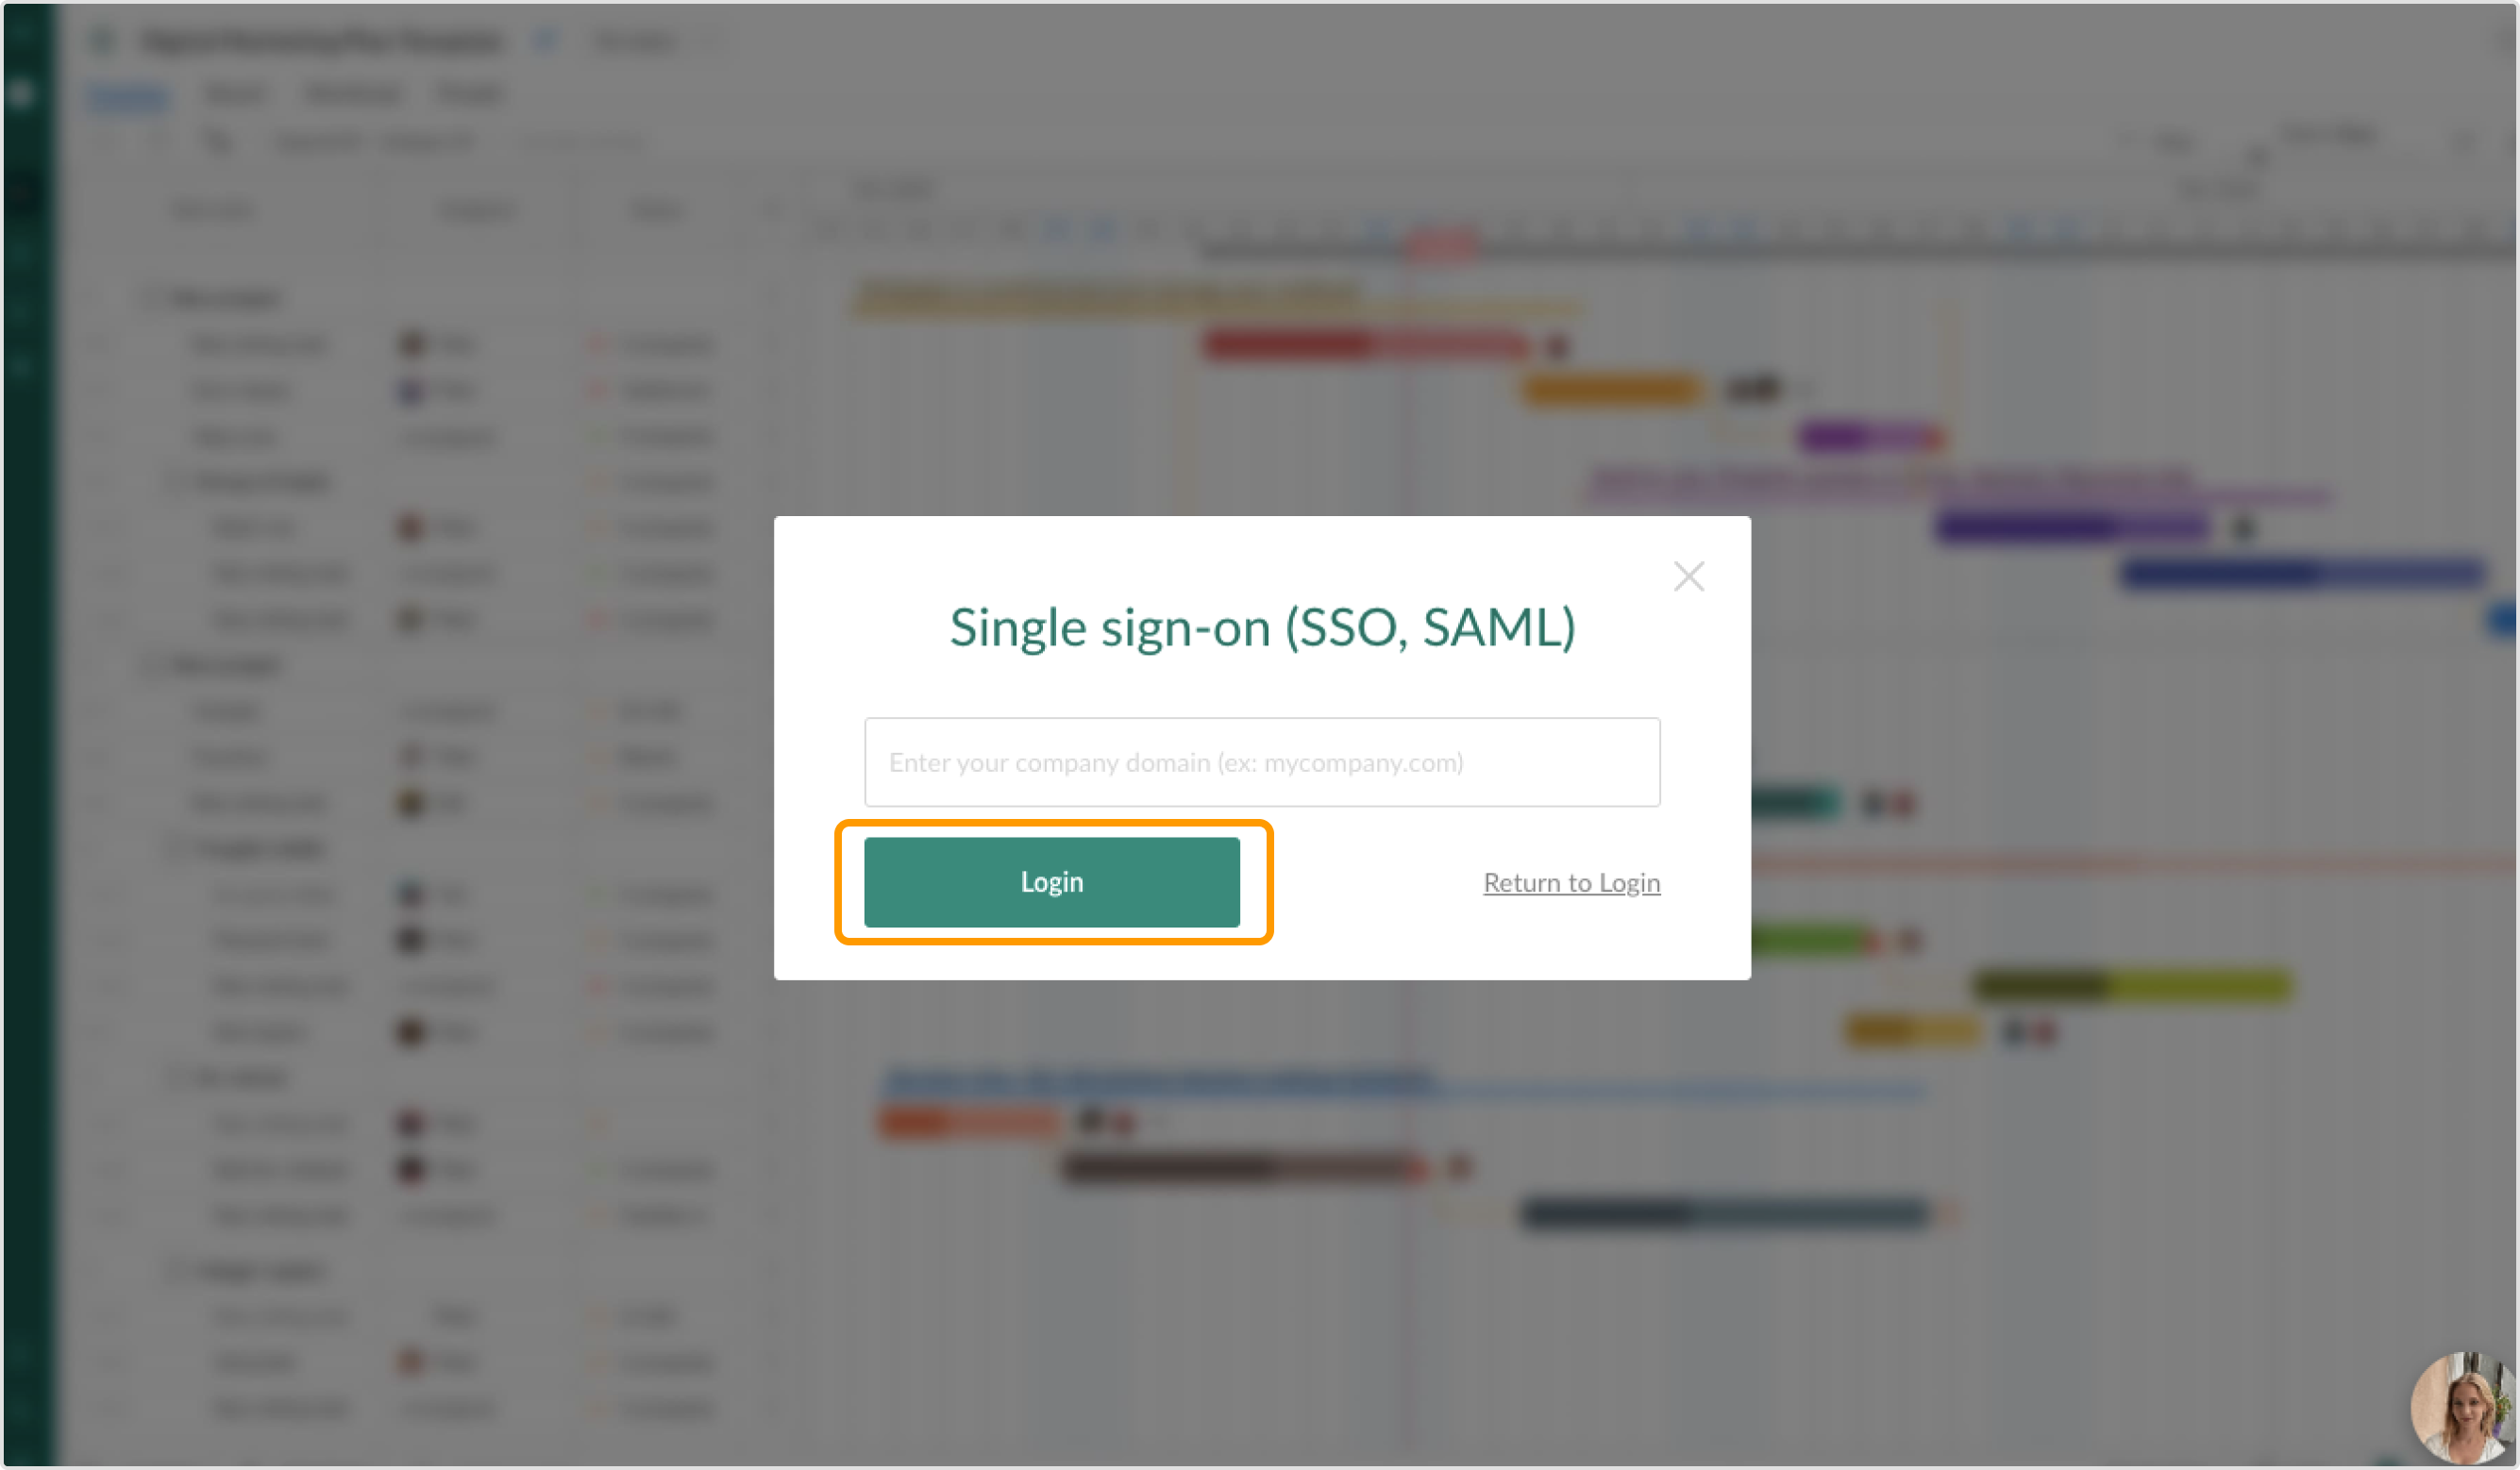
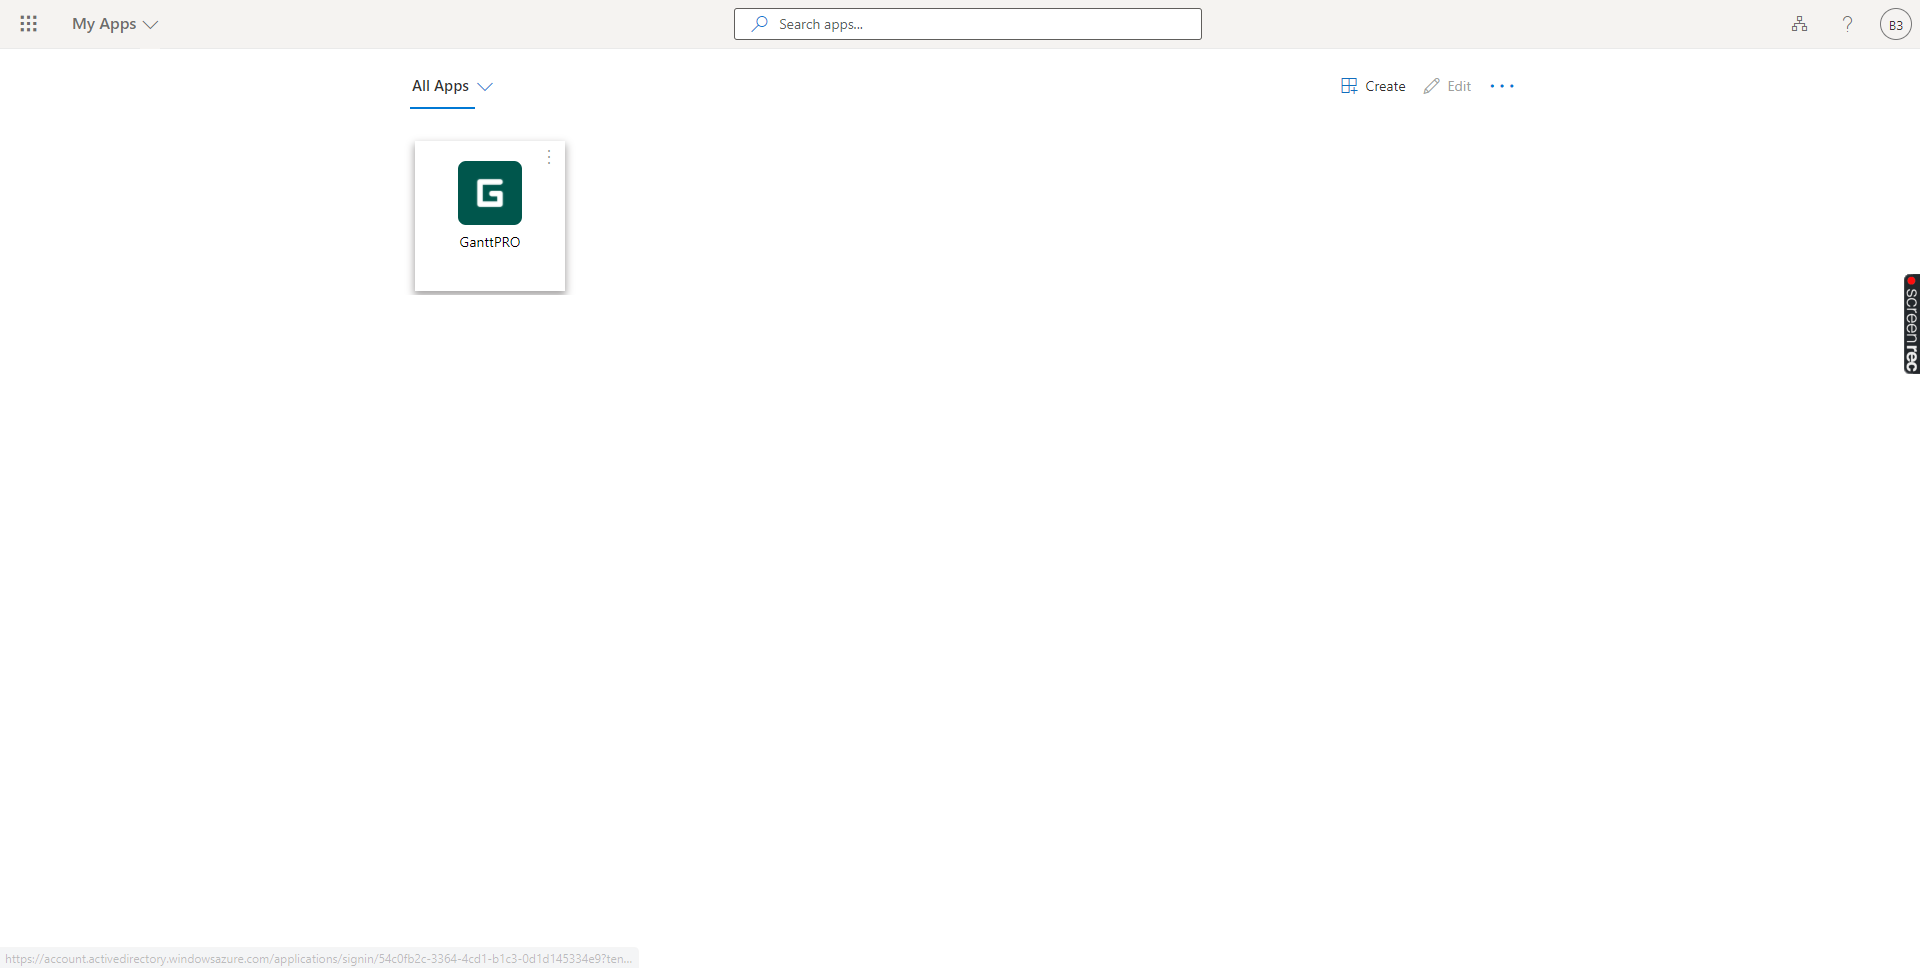 Alternatively, a user can login to GanttPRO through SSO with a company’s domain. For that, it will be necessary to:
- Open ganttpro.com
- Click on Login in the upper right corner
- Click on Single sign-on (SSO, SAML)
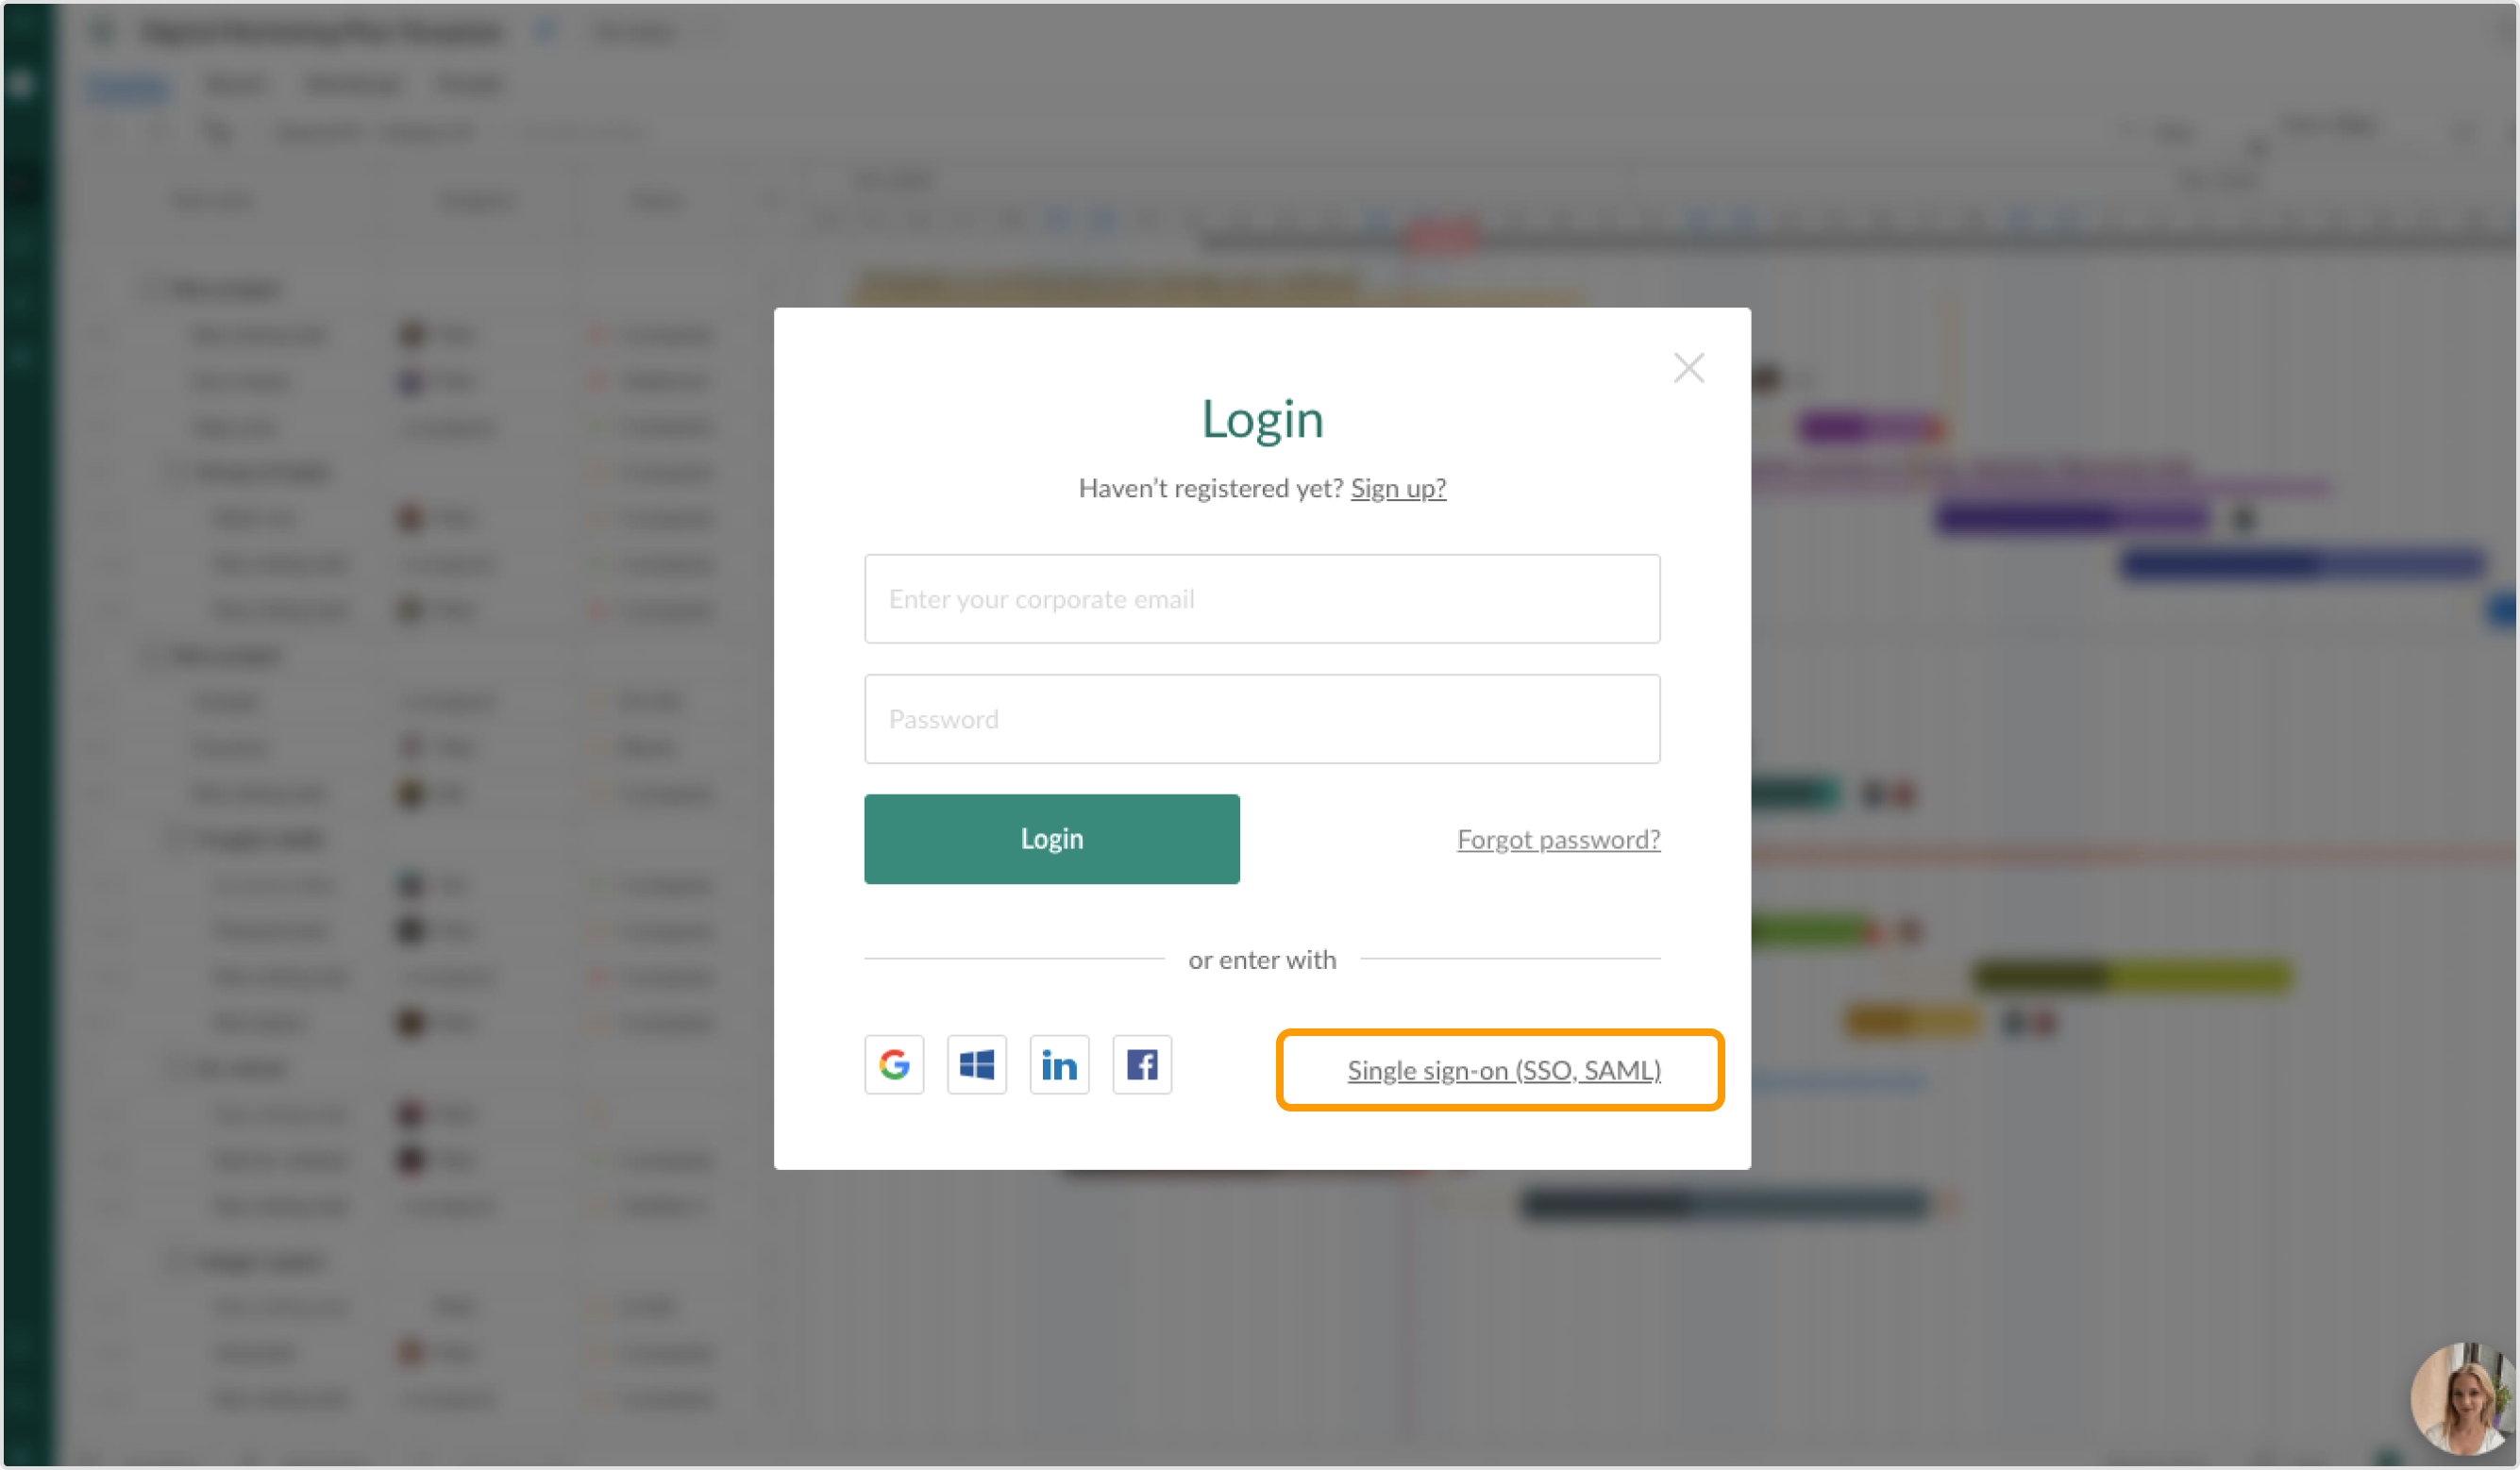
- Introduce the company's domain, and click on Login.
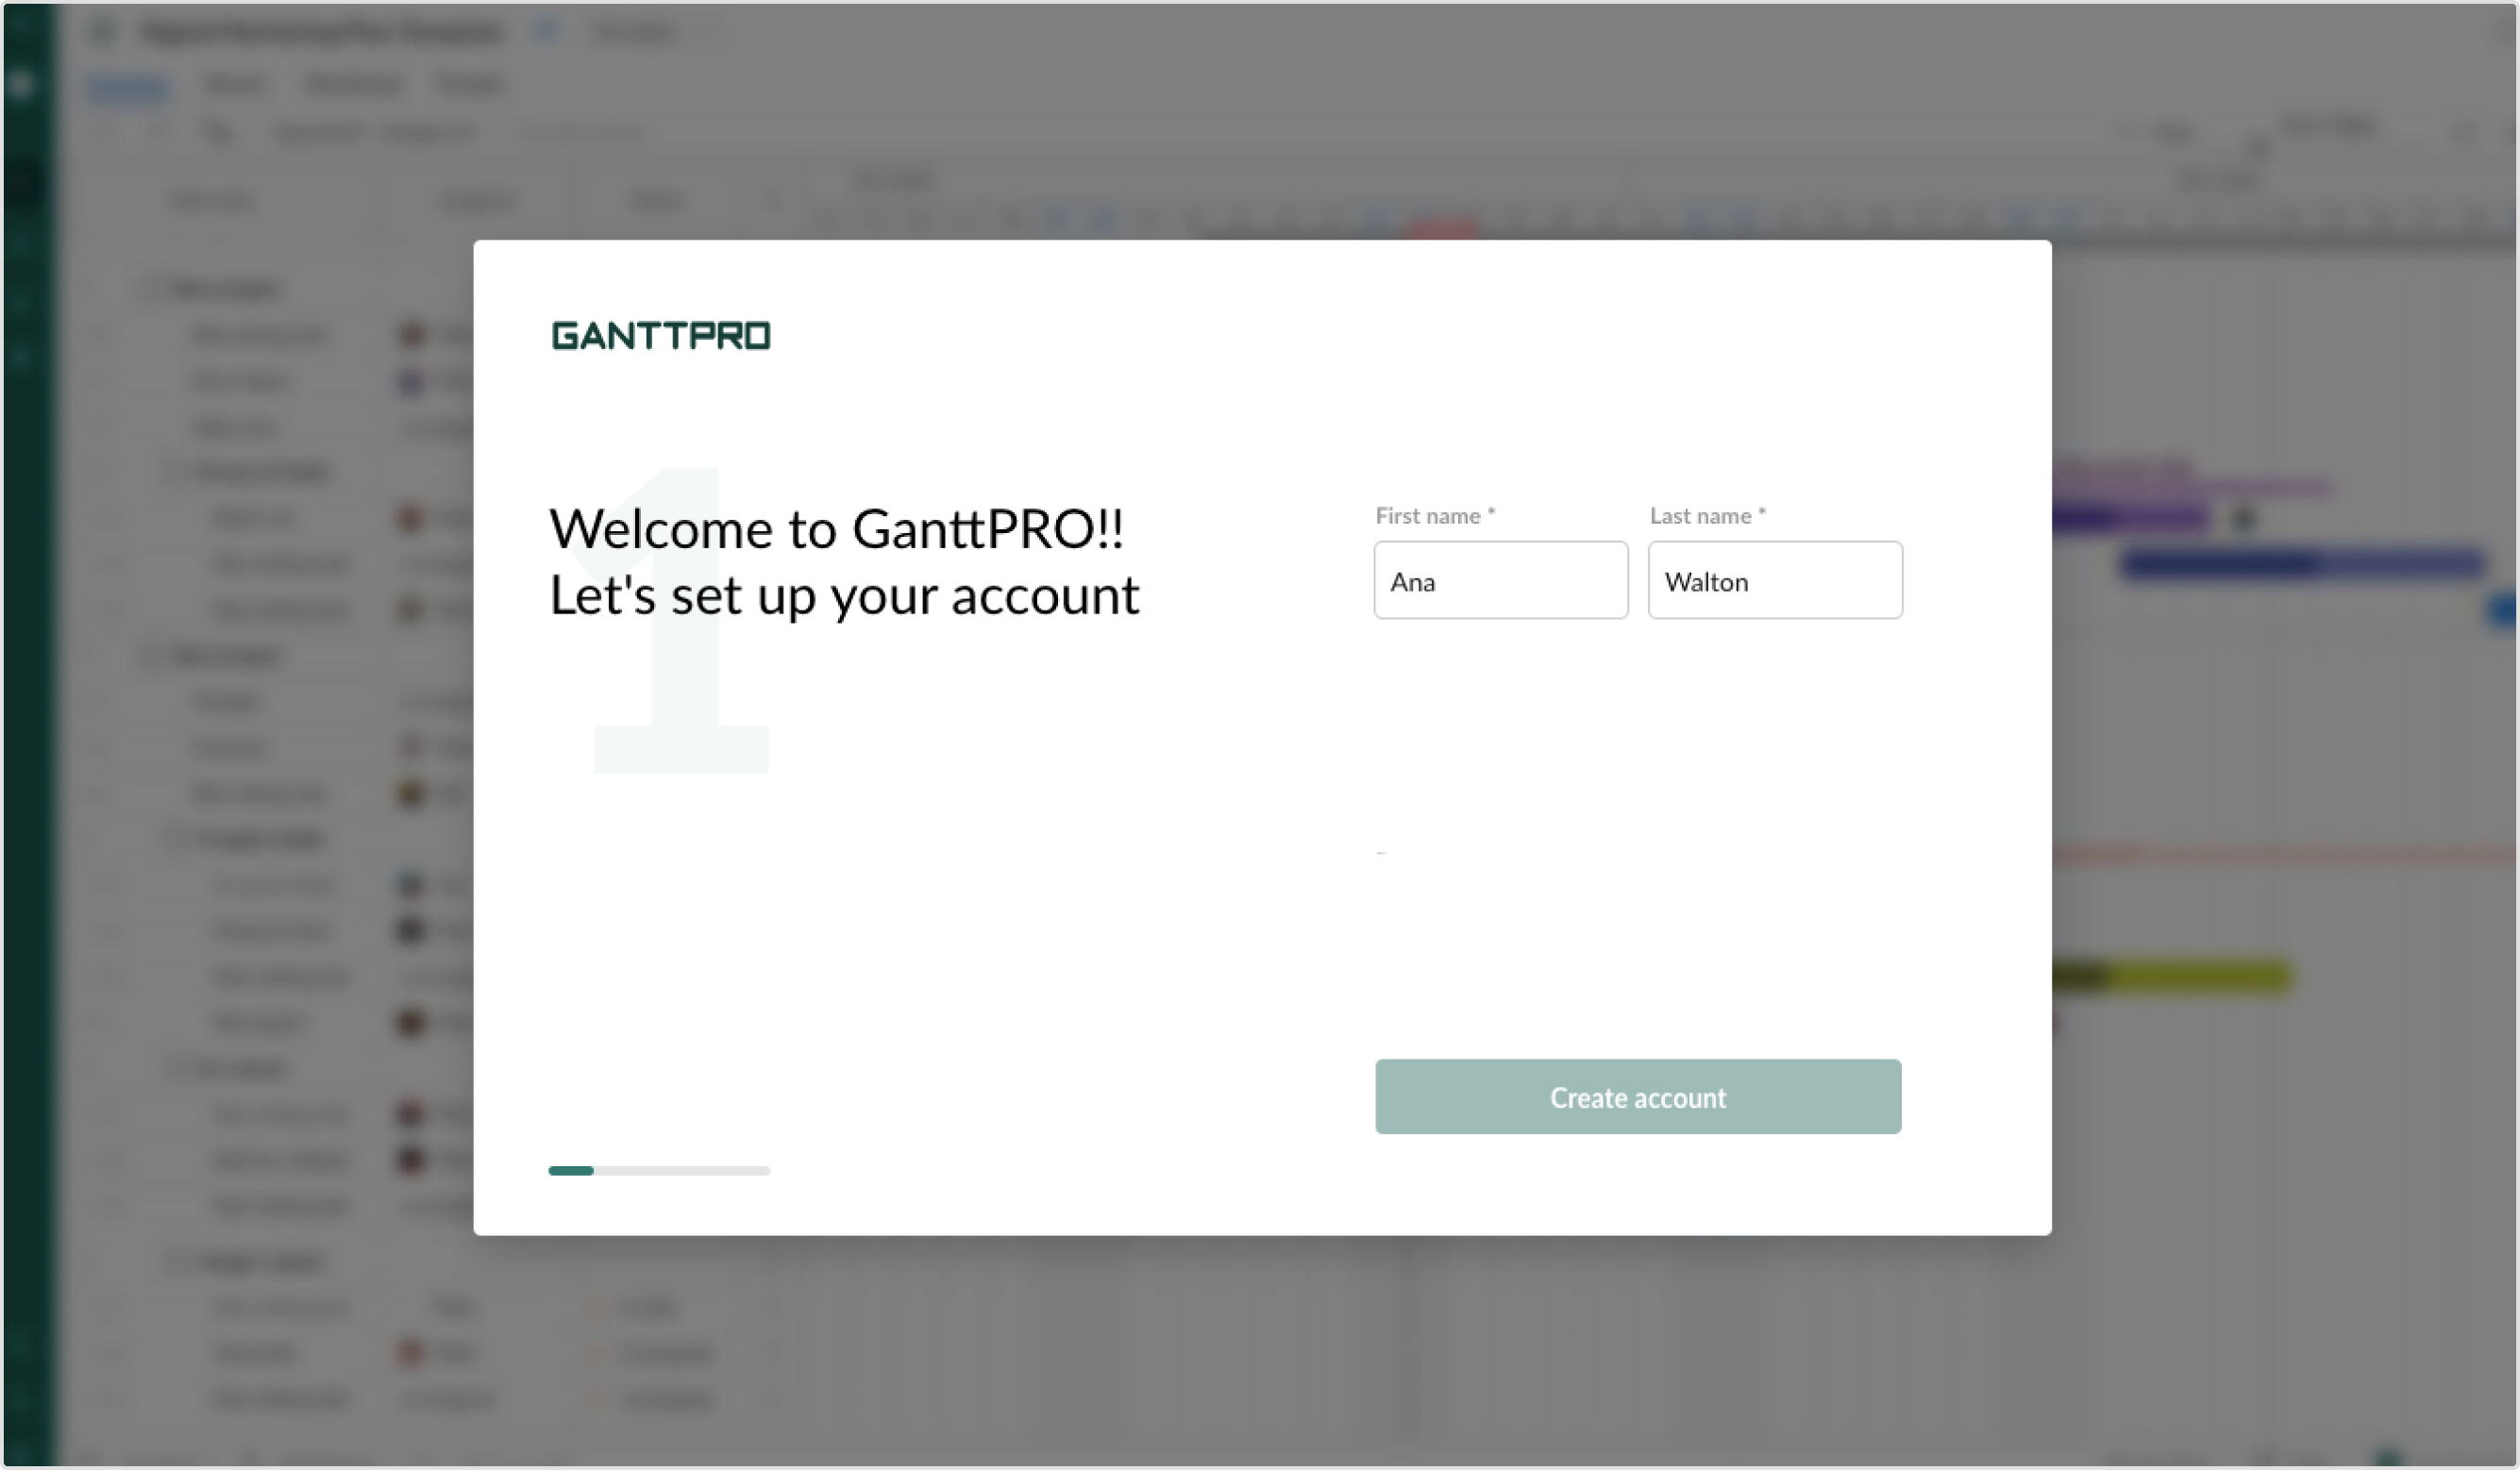
 Note that if the user has not yet registered in GanttPRO, s/he will see a registration page upon signing in the app for the first time through the SSO. Thus, this user will be required to introduce First and Last names.
Once a user creates an account, s/he will be able to join the team with a Member account role. An Account Owner will see a new user in the Team and resources section in the Account settings.
Check this article, if you have troubles adding users through the SSO.