The process is the same as with .xlsx files.
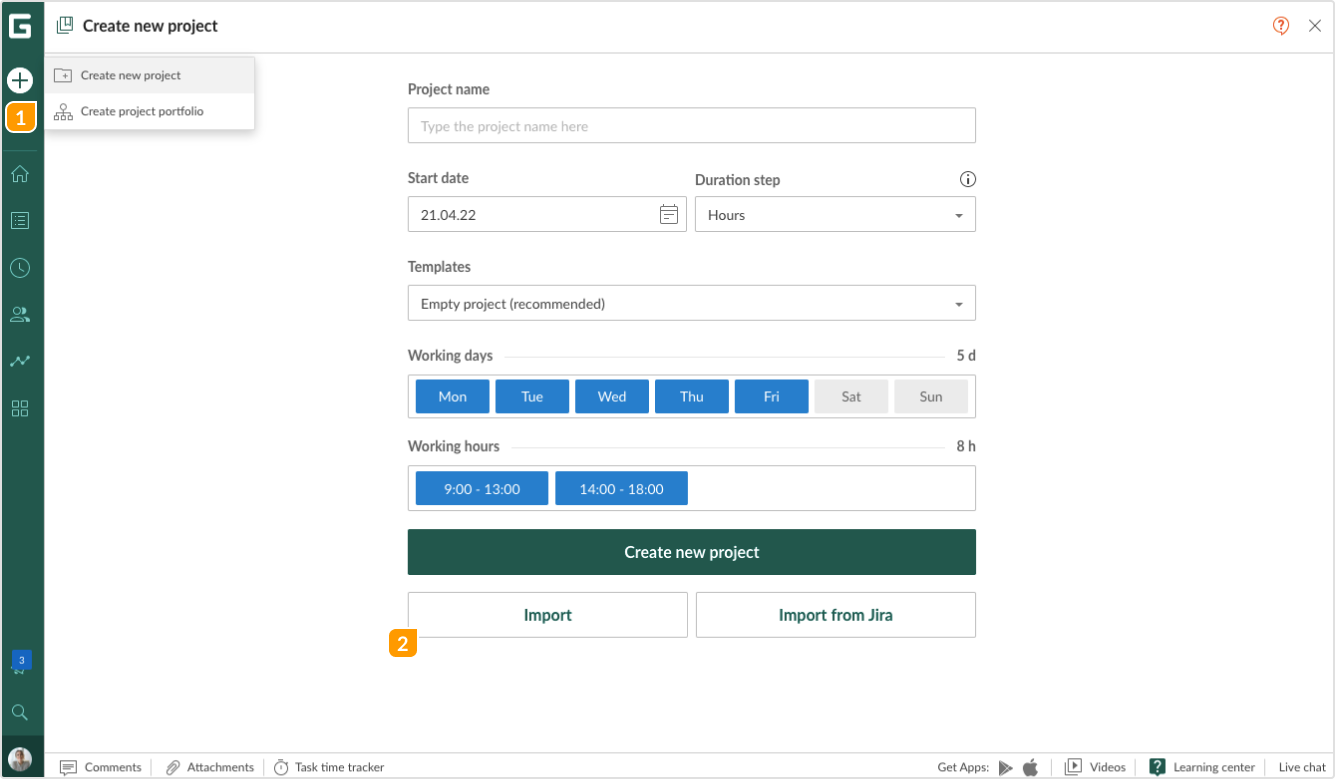
To import your file in .csv format, click on the + icon in the top left corner of the page, and then select Create new project. On the project creation page click on Import.

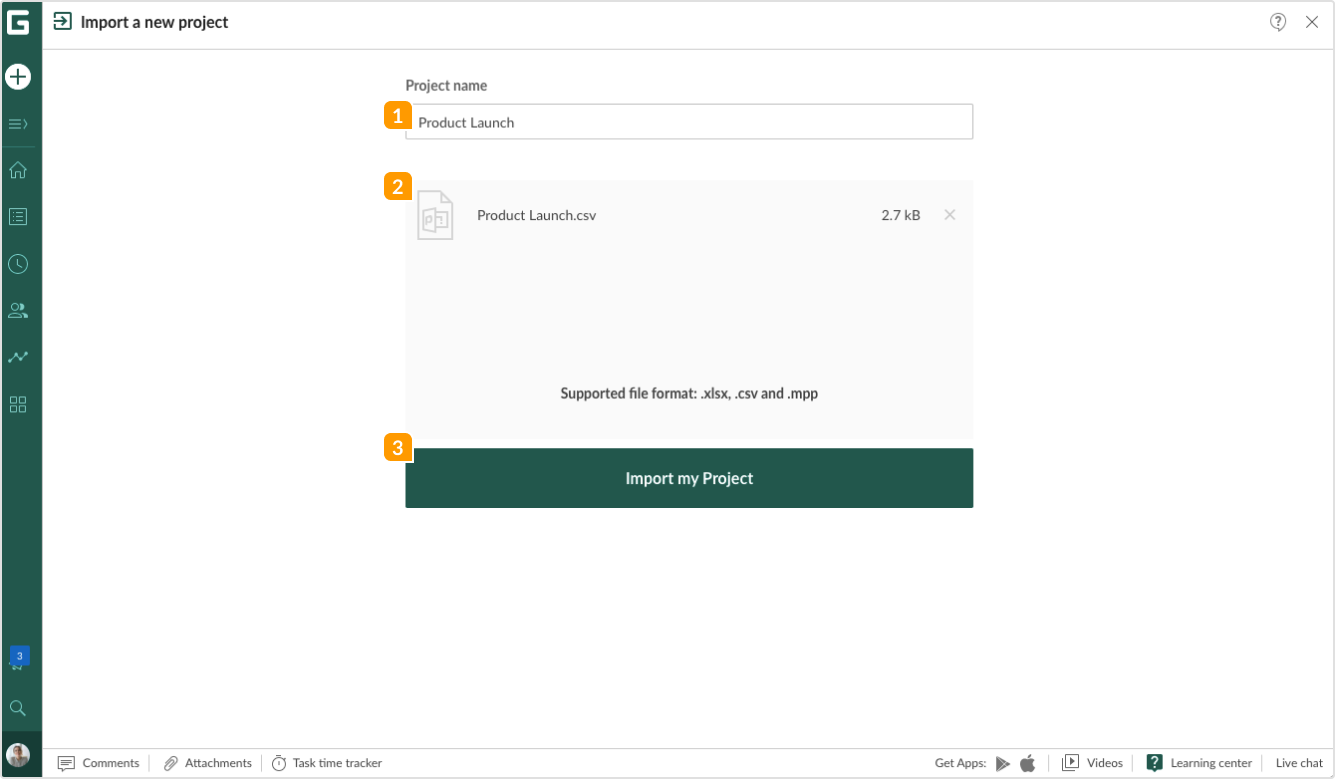
An import window will appear. Type the name of your project 1. Otherwise, it will be named as your .csv file. Select the document from your computer or just drag & drop it to the designated area 2, and then click on Import 3.

Note: If there are several spreadsheets in your original document, you will be asked to choose the one for import.
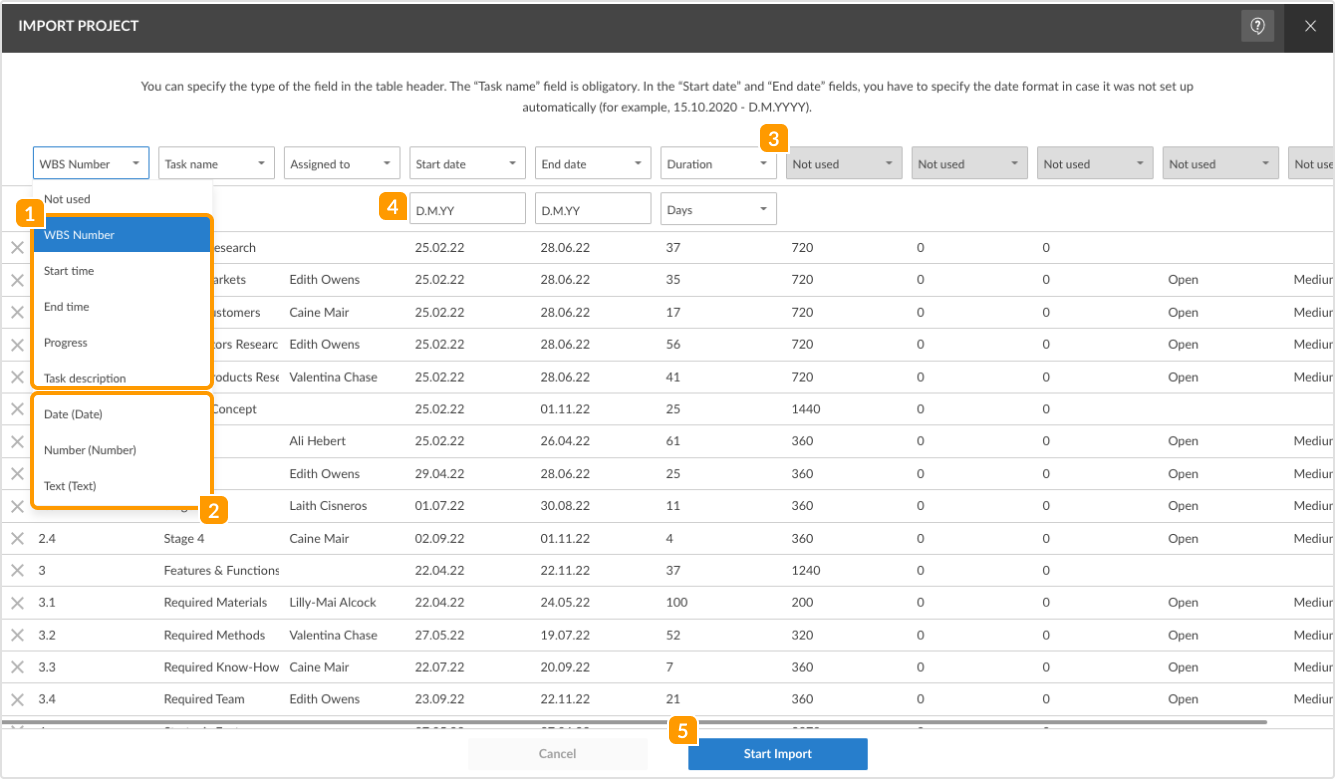
After that, you will see your project data. Assign the fields according to their contents choosing the options from the drop-down menu of each field.
There you have the following options 1:
- WBS number
- Task name
- Start and End dates and time
- Duration
- Progress
- Task description
- Assignee
Note: You can also import such Custom fields as Text, Number and Date 2. But they have to be created beforehand in the Custom field section of Profile settings. Check here how to create Custom fields.
If you don’t need a field or it does not fit into any existing category, leave it within the Not used category 3.
Do not forget to indicate the format of End and Start dates 4 you have used in your .csv file for a correct import.
Additionally, make sure that:
- there are no extra spaces or irrelevant characters in cells;
- all the cells with duration and dates have set values.

Once you have configured all the necessary fields, click on Start Import 5. When the import process is finished, you will see your project in GanttPRO.